An ultimate step-by-step guide on Checkmk Cloud Monitoring
.avif)


Checkmk launched Checkmk Cloud (SaaS) in February 2025, which is a fully managed, cloud-based version of their monitoring technology. This solution, designed for ease of use, allows enterprises to start monitoring their IT infrastructure with no installation, maintenance, or manual upgrades required. The SaaS version is compatible with both cloud-based and on-premises systems, bringing them together under a single, straightforward platform.
As Checkmk is one of the popular monitoring solutions chosen by ilert users, we decided to dive deep and test this new SAAS version to provide you with a helpful guide on connecting your Checkmk monitoring with the ilert incident management platform.
If you get stuck or anything is unclear, reach out to the ilert support team via the chat widget. We are happy to help!
What this guide covers
This step-by-step guide will help you:
- Set up and configure Checkmk Cloud Monitoring for cloud-based and on-premises infrastructure
- Create a dedicated IAM user in your AWS account with the necessary permissions to allow Checkmk to access and monitor your AWS resources.
- Build an intuitive dashboard to monitor performance, detect anomalies, and gain real-time insights.
- Receive critical Checkmk alerts via multiple channels, like SMS, phone calls, messengers, or push notifications with the help of ilert.
Prerequisites: What you will need to follow this guide
- A registered account on Checkmk.
- AWS Account with API Access.
- IAM (Identity and Access Management) access.
- A Checkmk Cloud instance deployed and accessible via a browser.
- A Windows-running machine.
Stage 1: Adding a Windows host via Checkmk agent
Adding hosts is now more straightforward with Checkmk Cloud, which supports deploying monitoring agents directly on target systems. This approach reduces the need for manual configuration and shortens setup time, helping administrators scale their monitoring infrastructure more efficiently.
- Select the Windows agent package.
- Open Powershell on your Windows machine and follow the instructions.
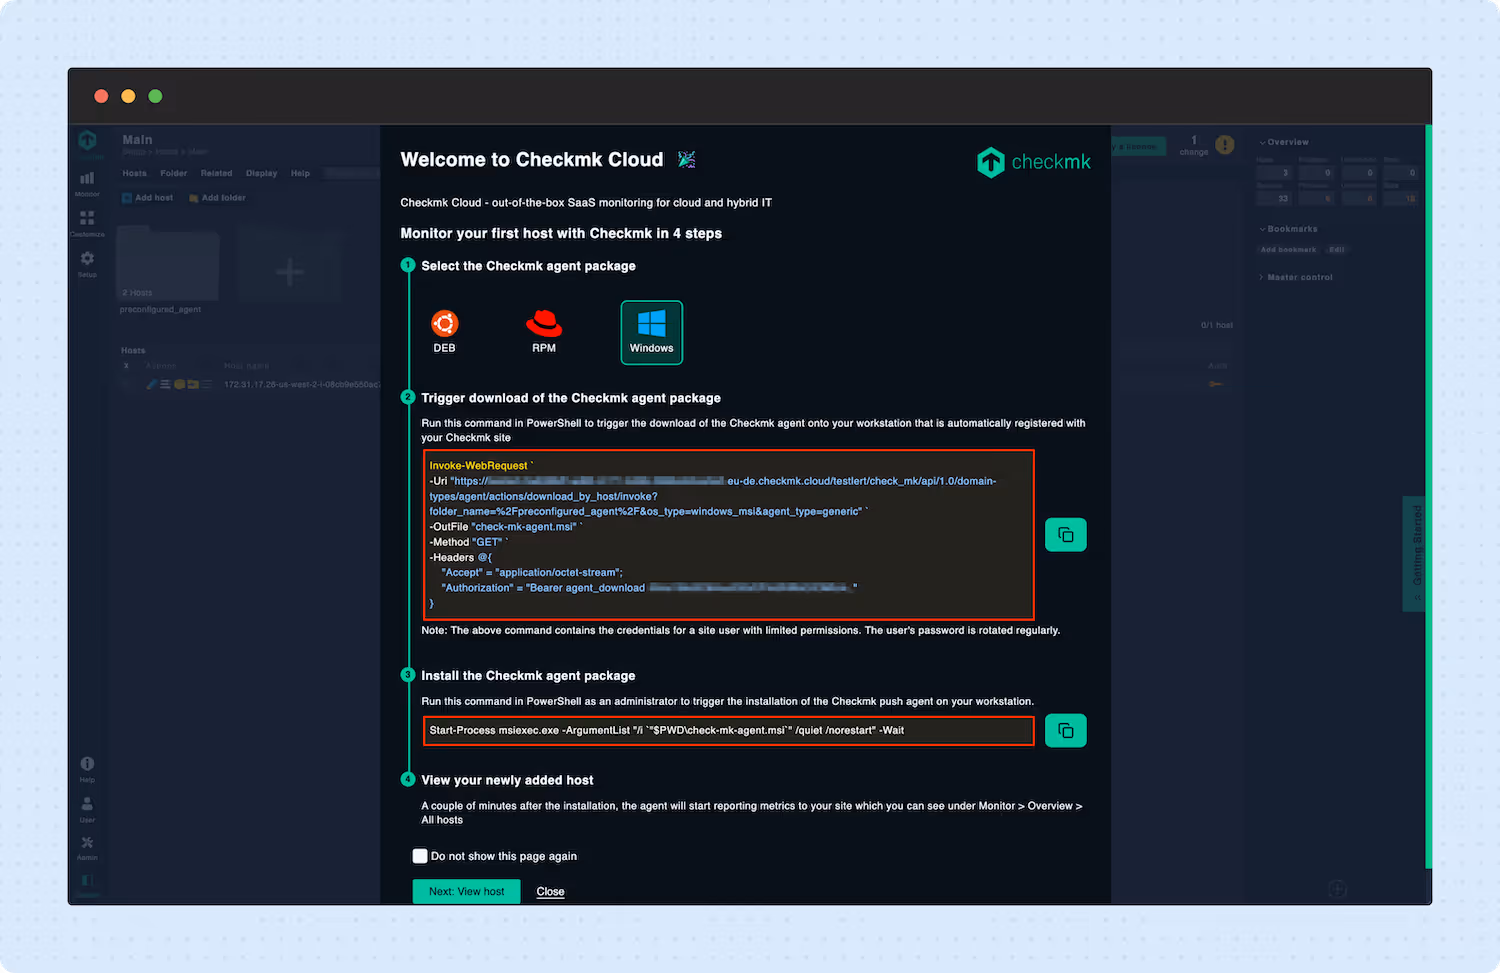
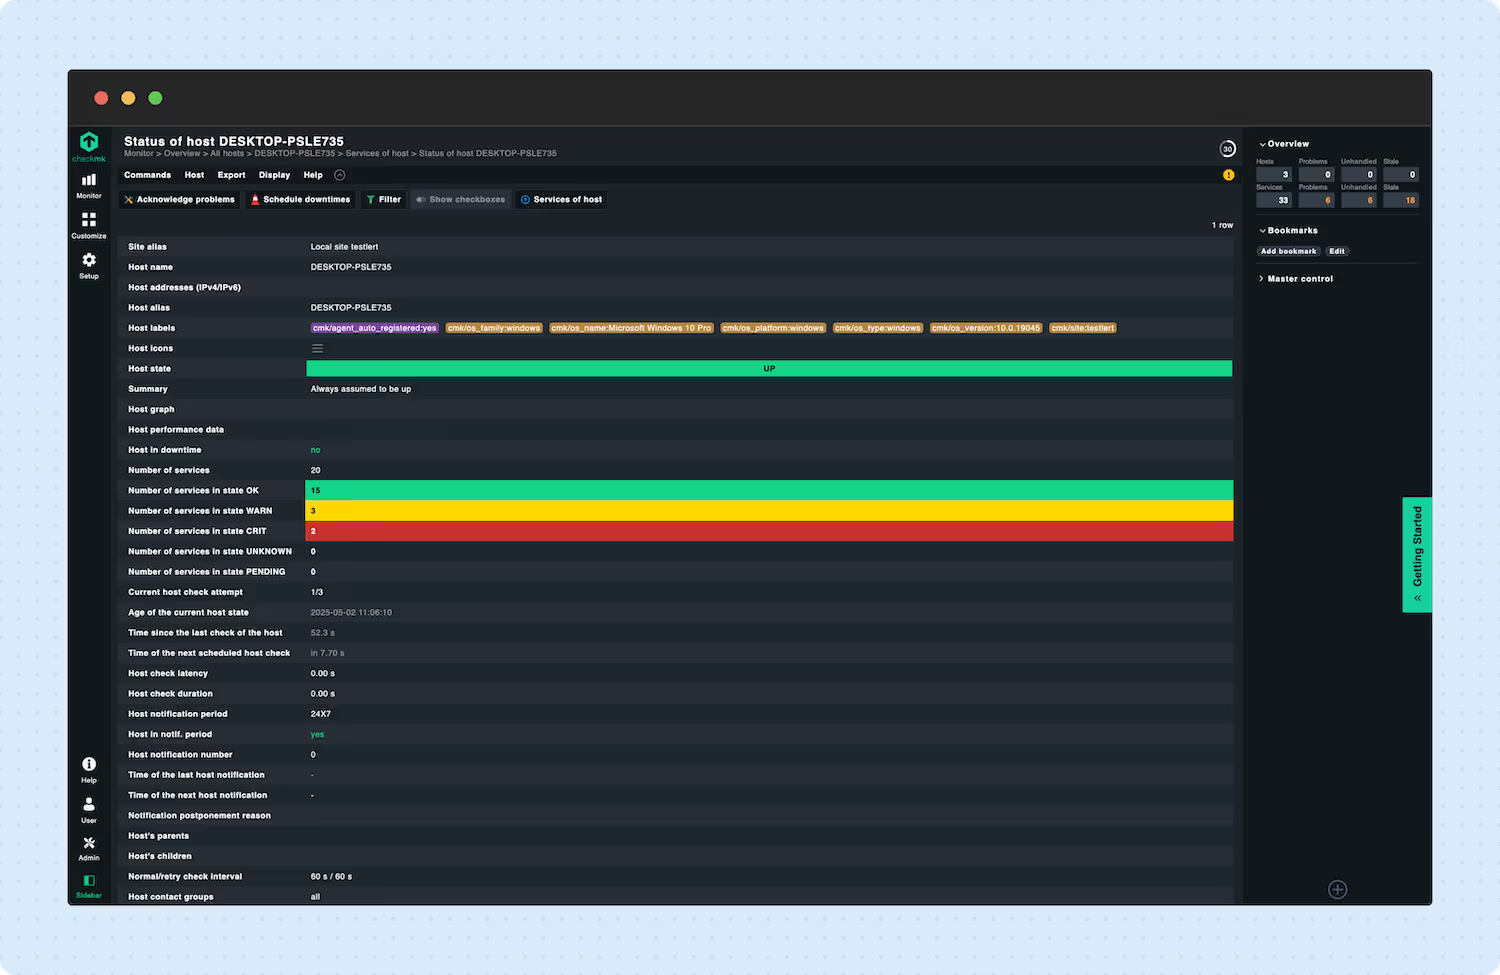
- Navigate to the newly added host.
Stage 2: Creating an IAM User for Checkmk
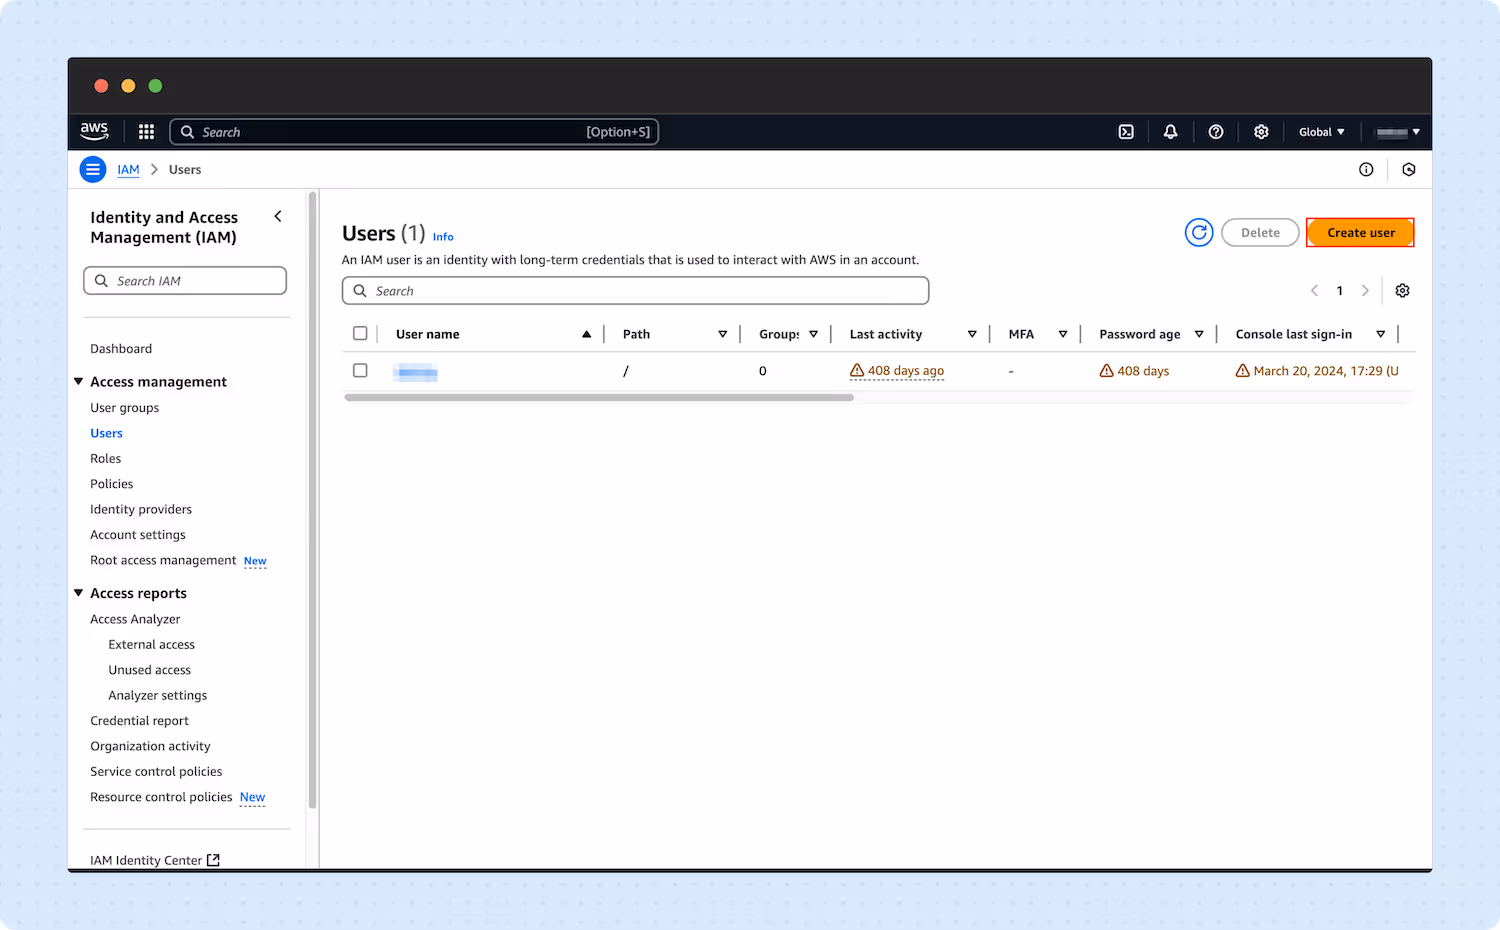
- In AWS, open the IAM service and go to users.
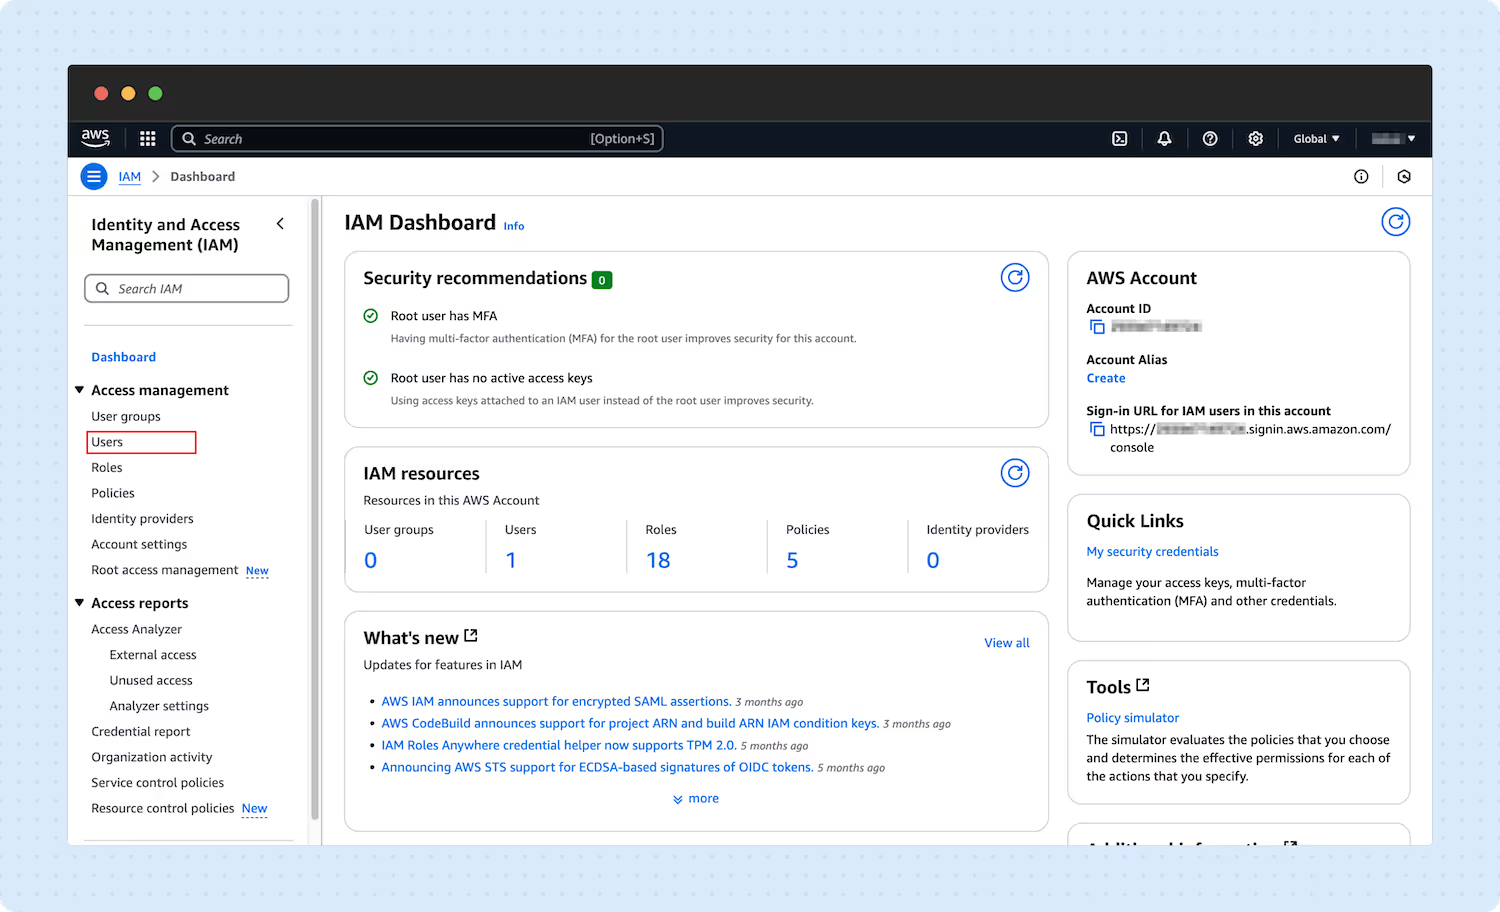
- In the top right corner, click “Create User.”
- Enter a User name.

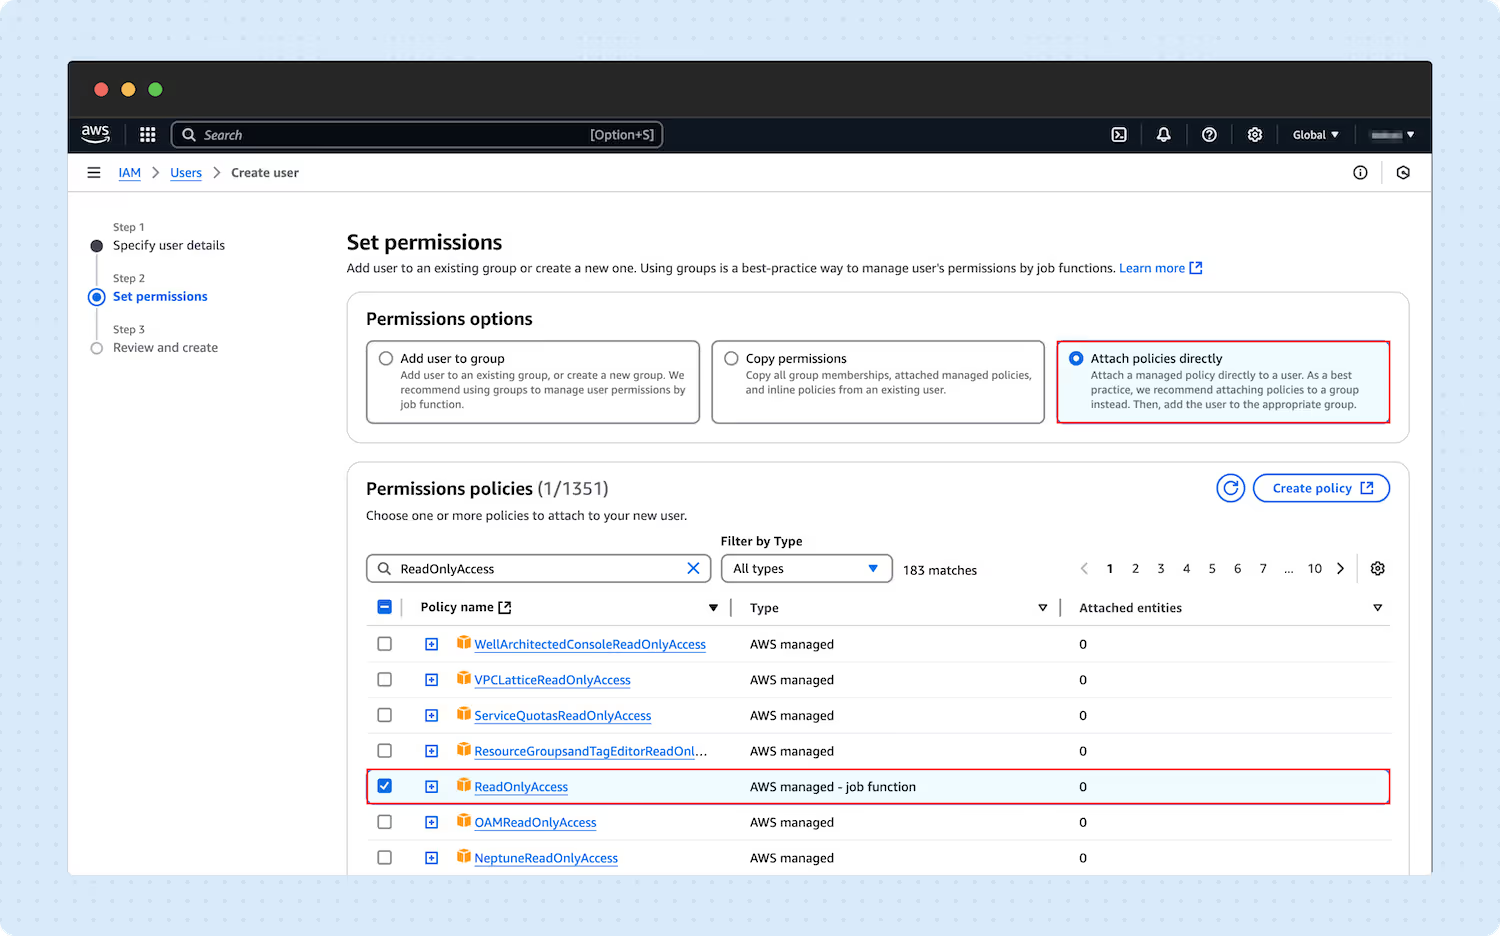
- In the next step, click Attach policy directly and select the ReadOnlyAccess in the Permission policies.
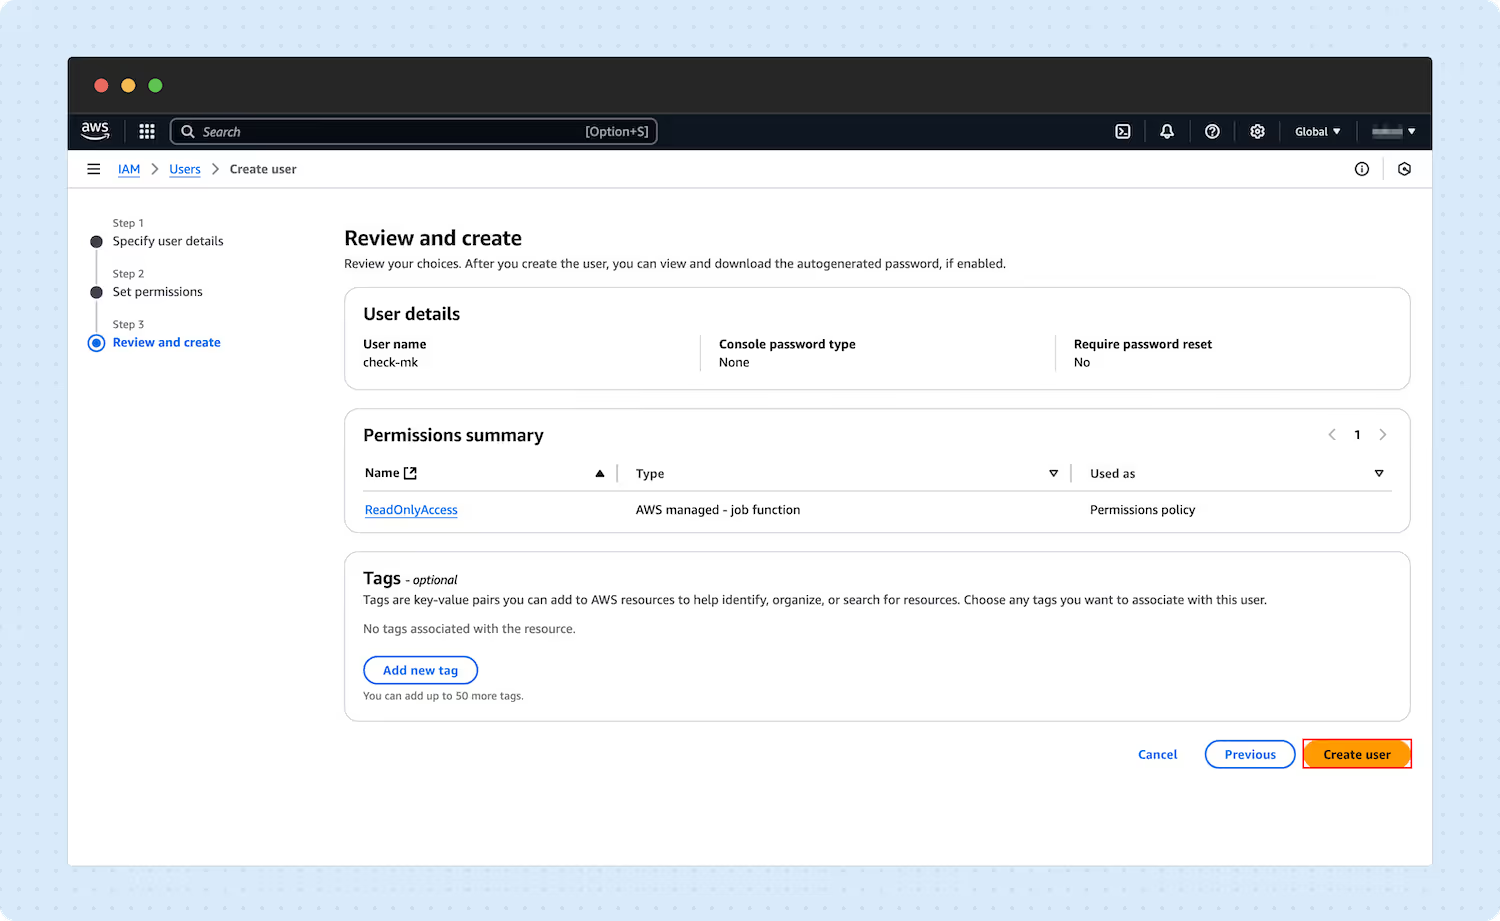
- Click Create user.
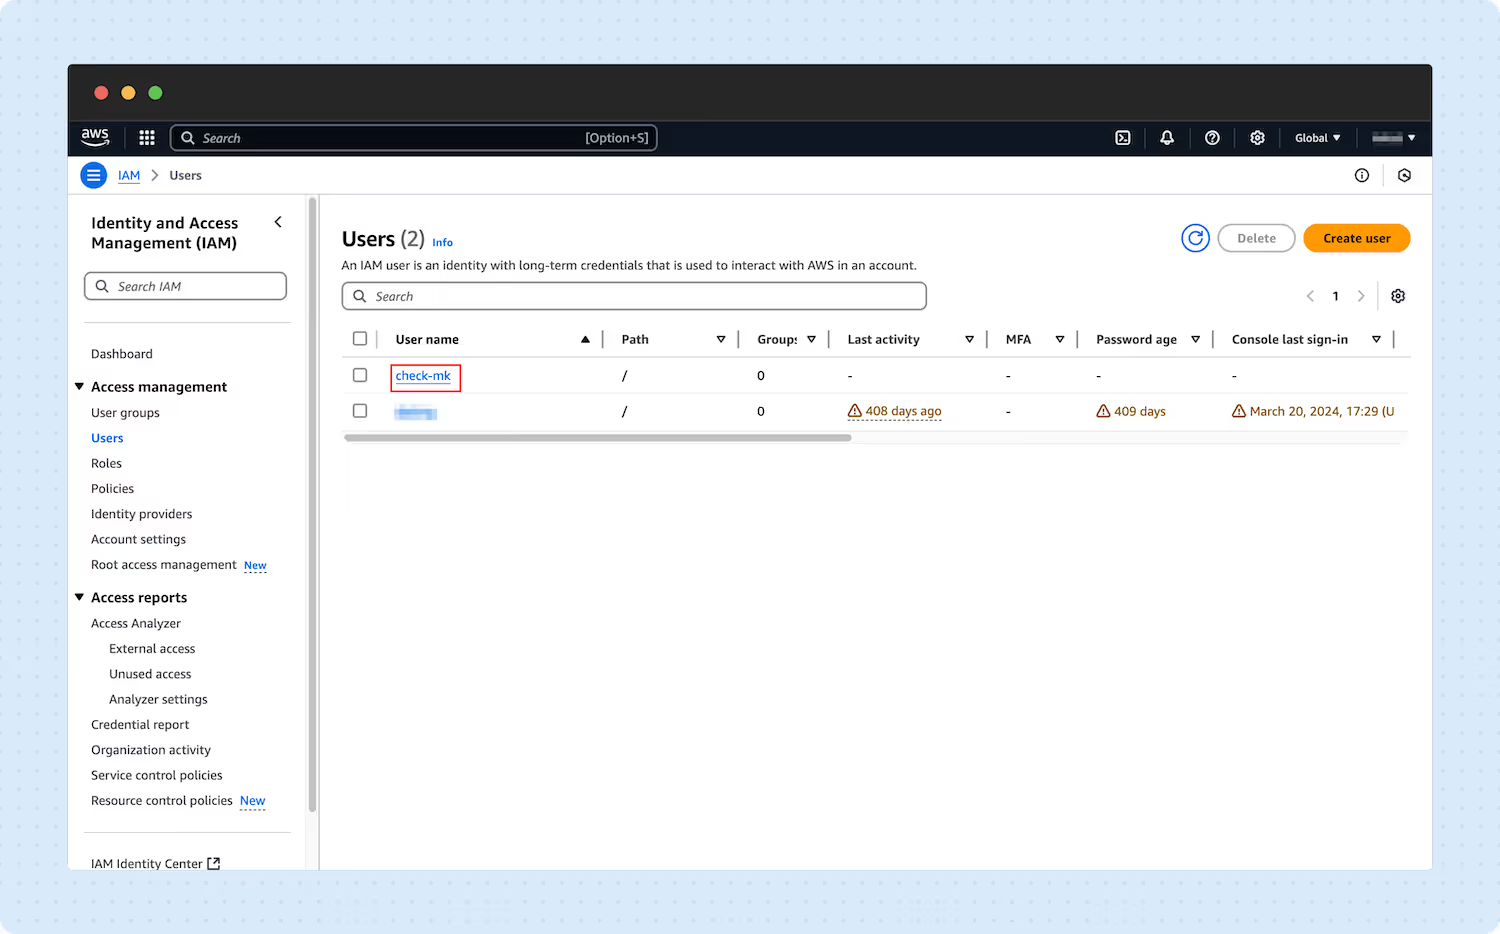
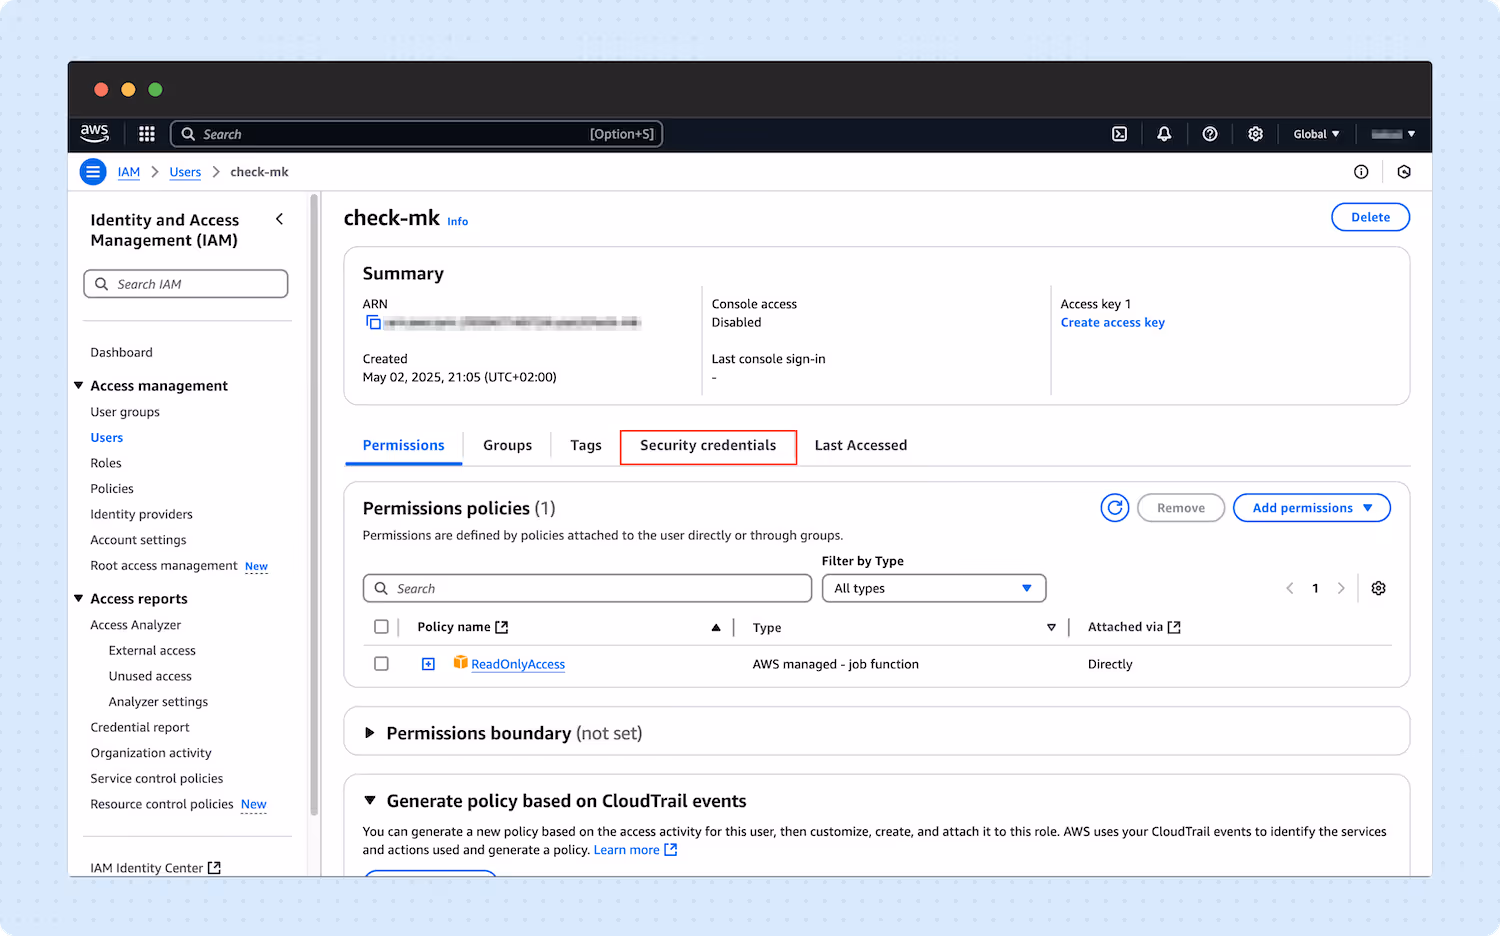
- Select the newly created user.
- Click Security credentials.
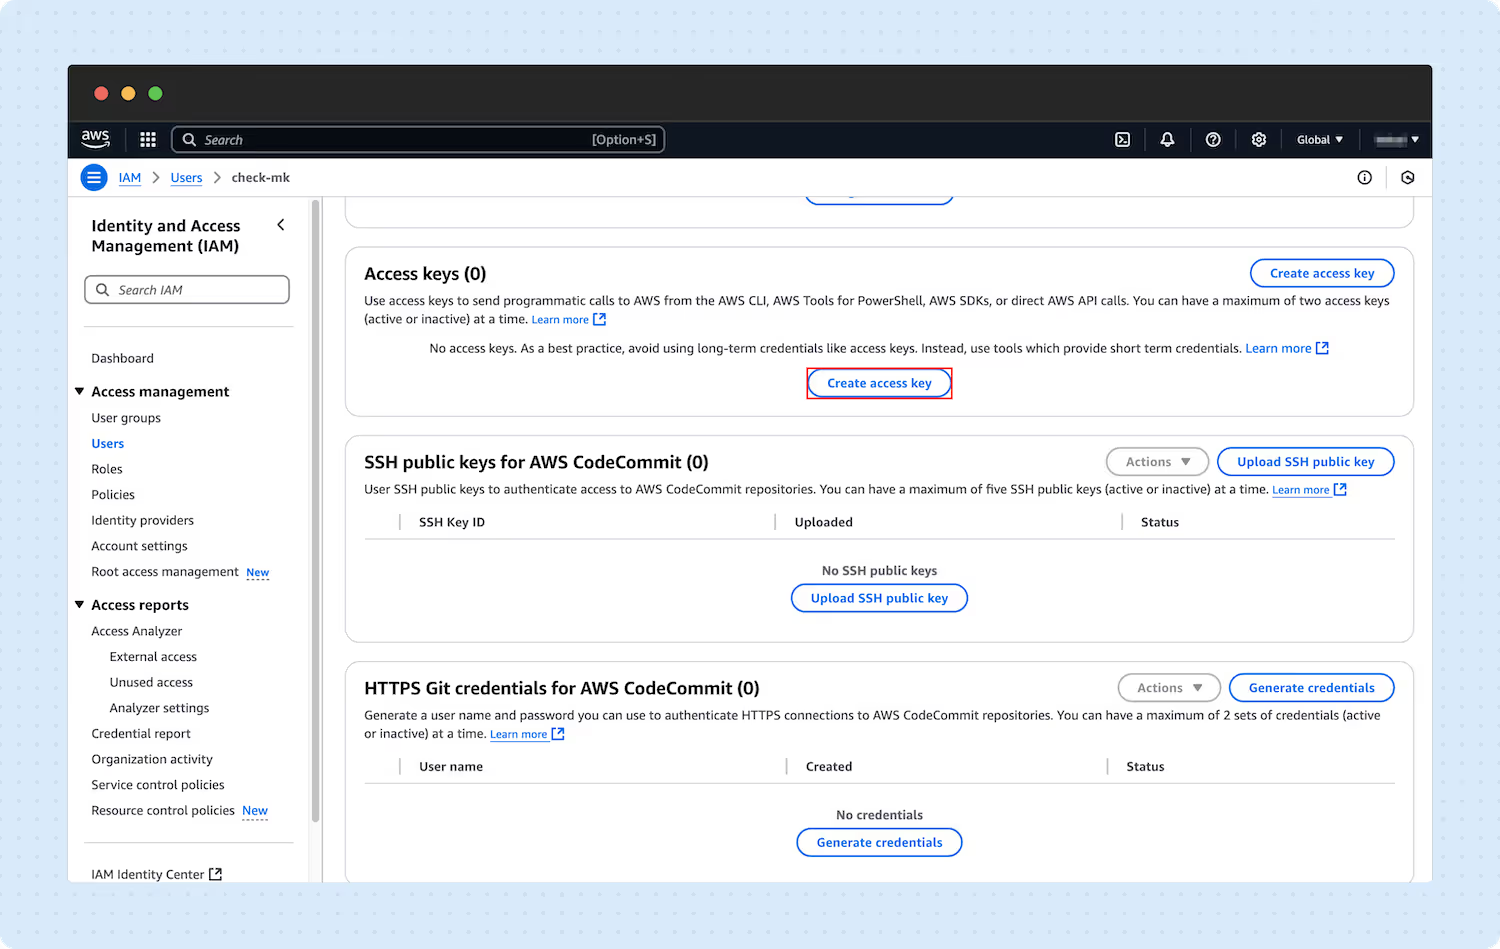
- Now, click Create access key.
- Select Third-party Service, accept the confirmation message, and click Next.

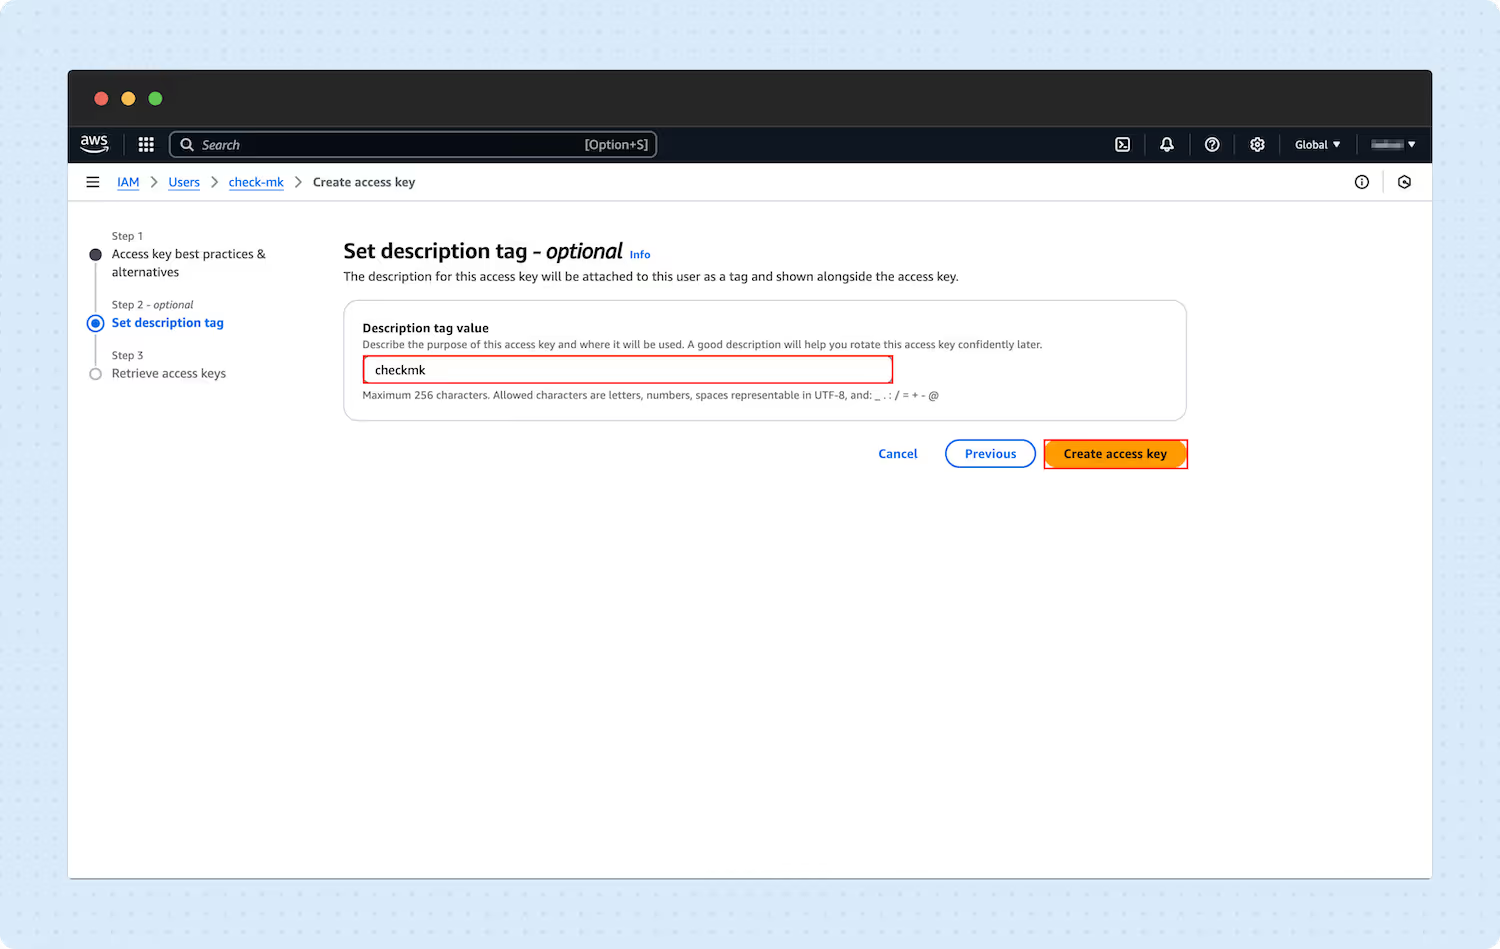
- Optional: Set a description tag.
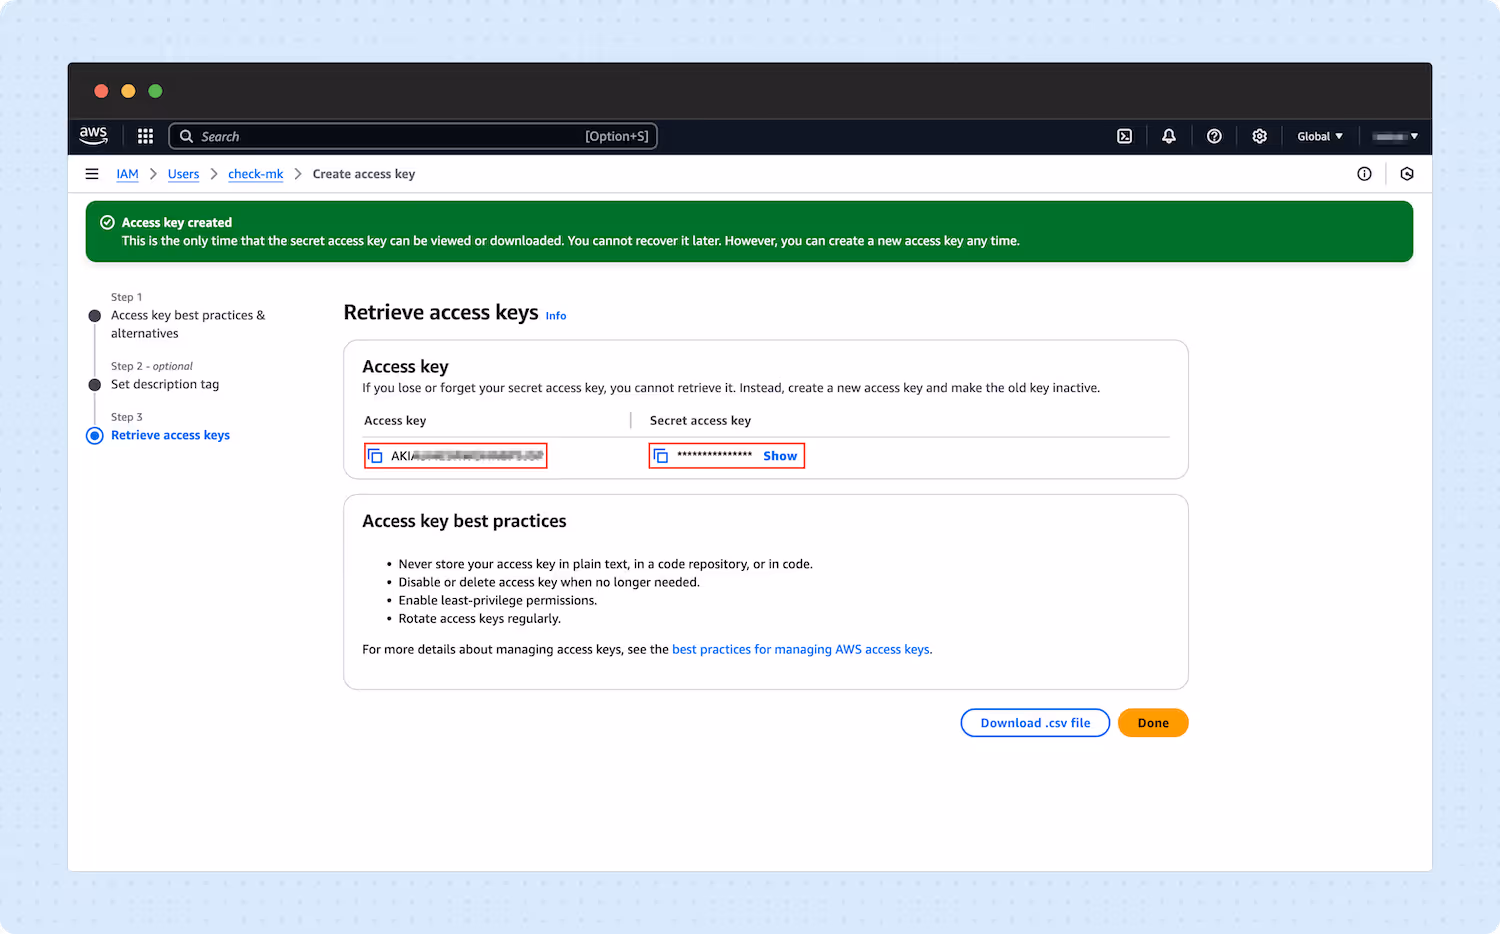
- An Access key and Secret key will be generated. You will need these two keys in the setup process for Checkmk Cloud cloud-based monitoring.
Stage 3: Adding an AWS host
- On the sidebar, click Setup -> Hosts.
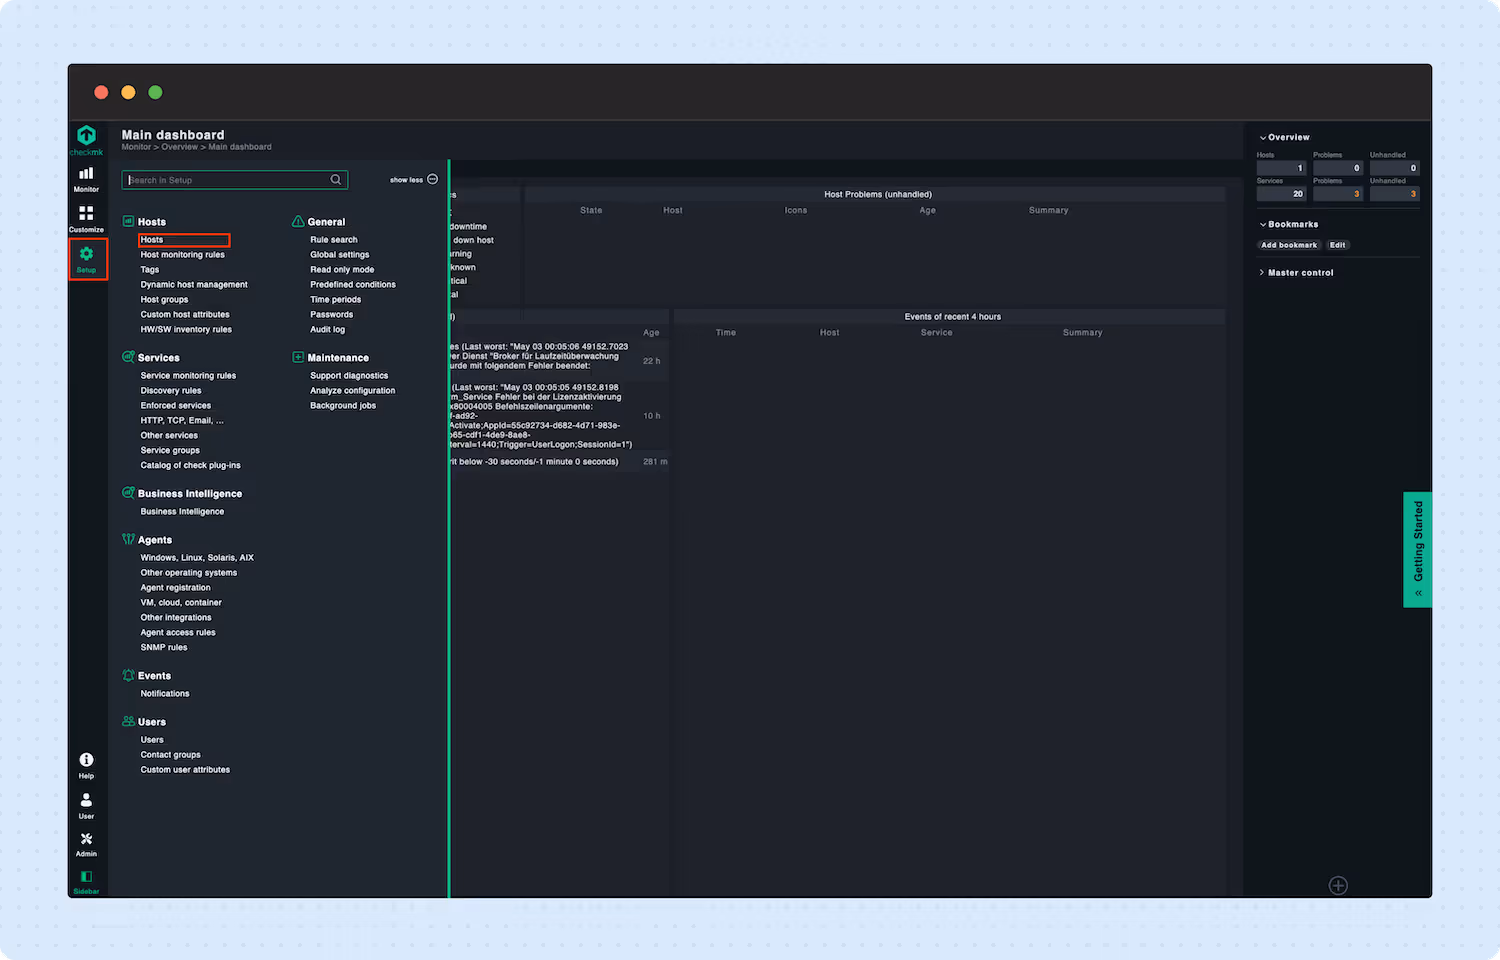
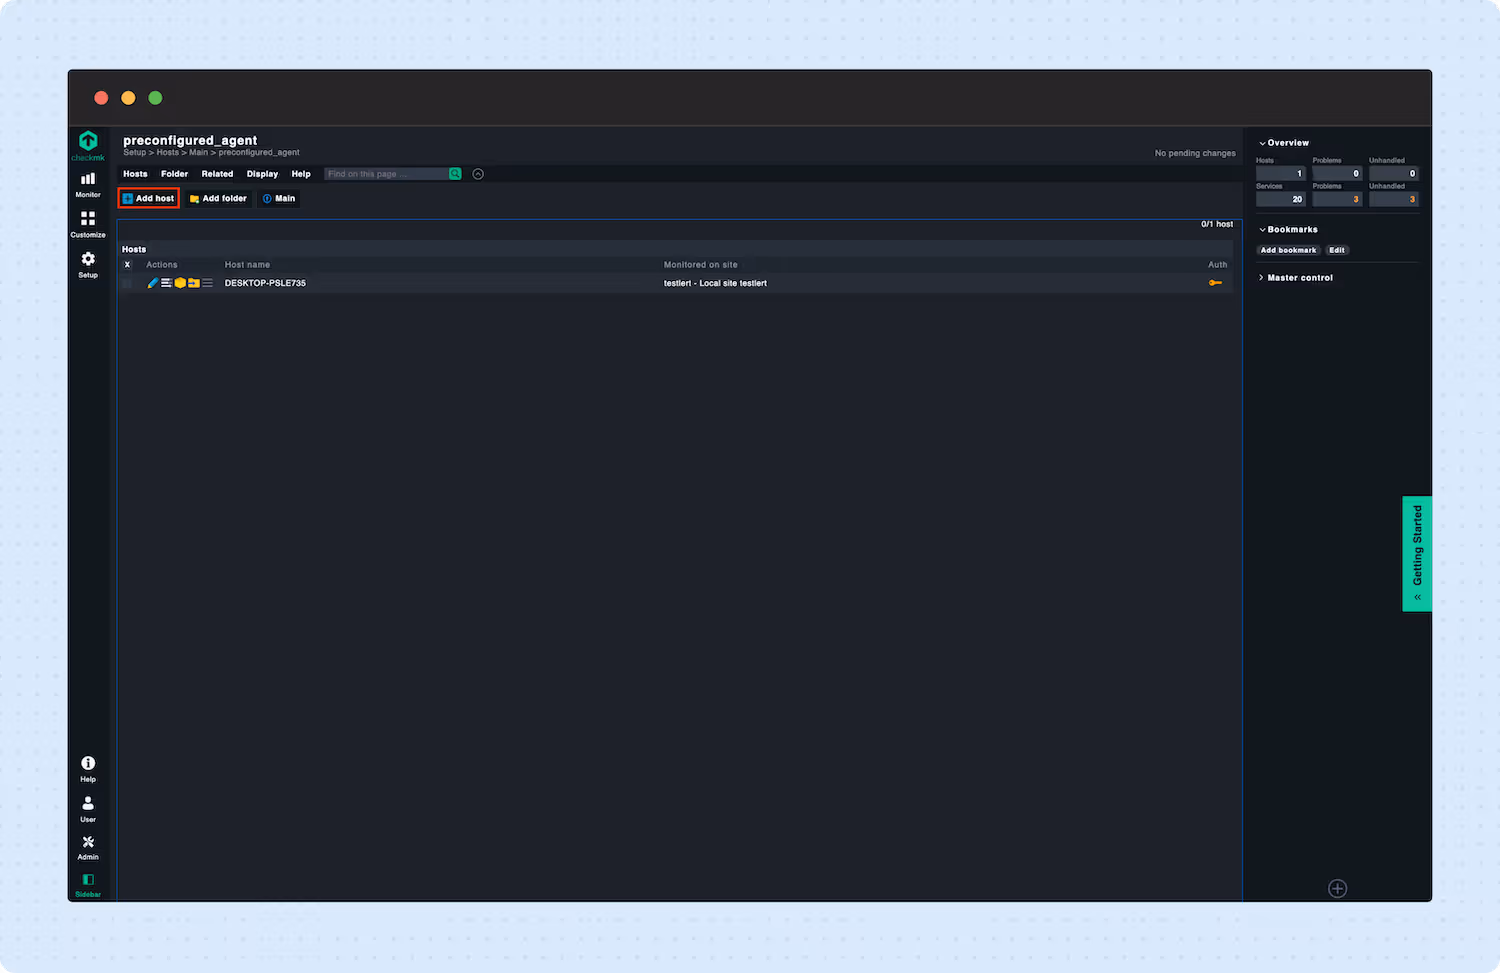
- Click Add host.
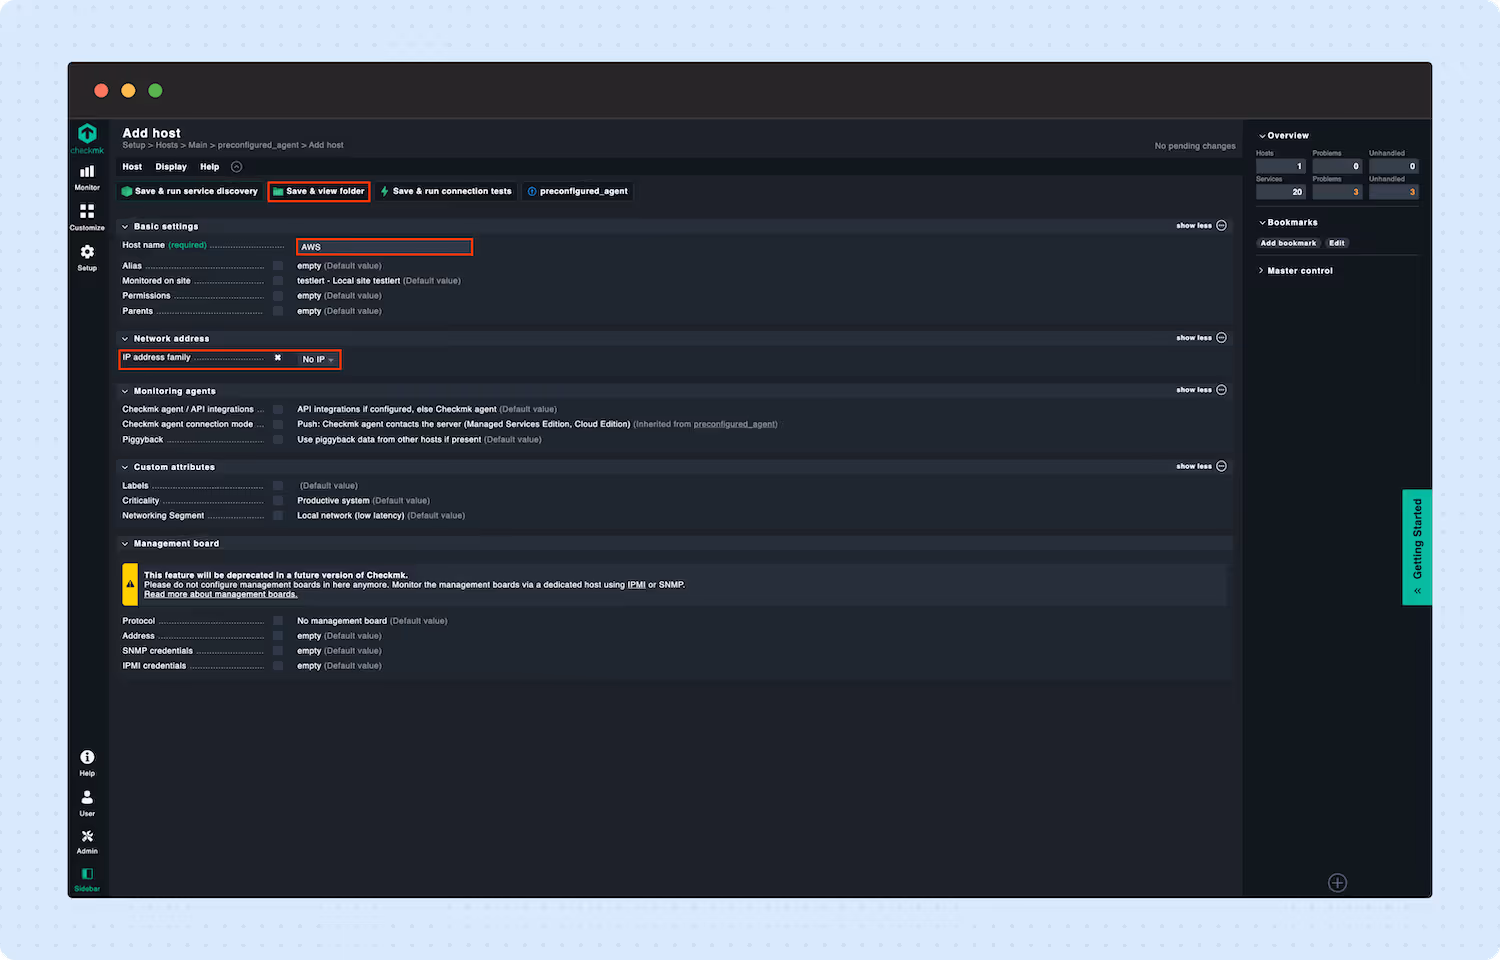
- Enter a Host name and set the IP address family to ‘No IP,’ then save the host.
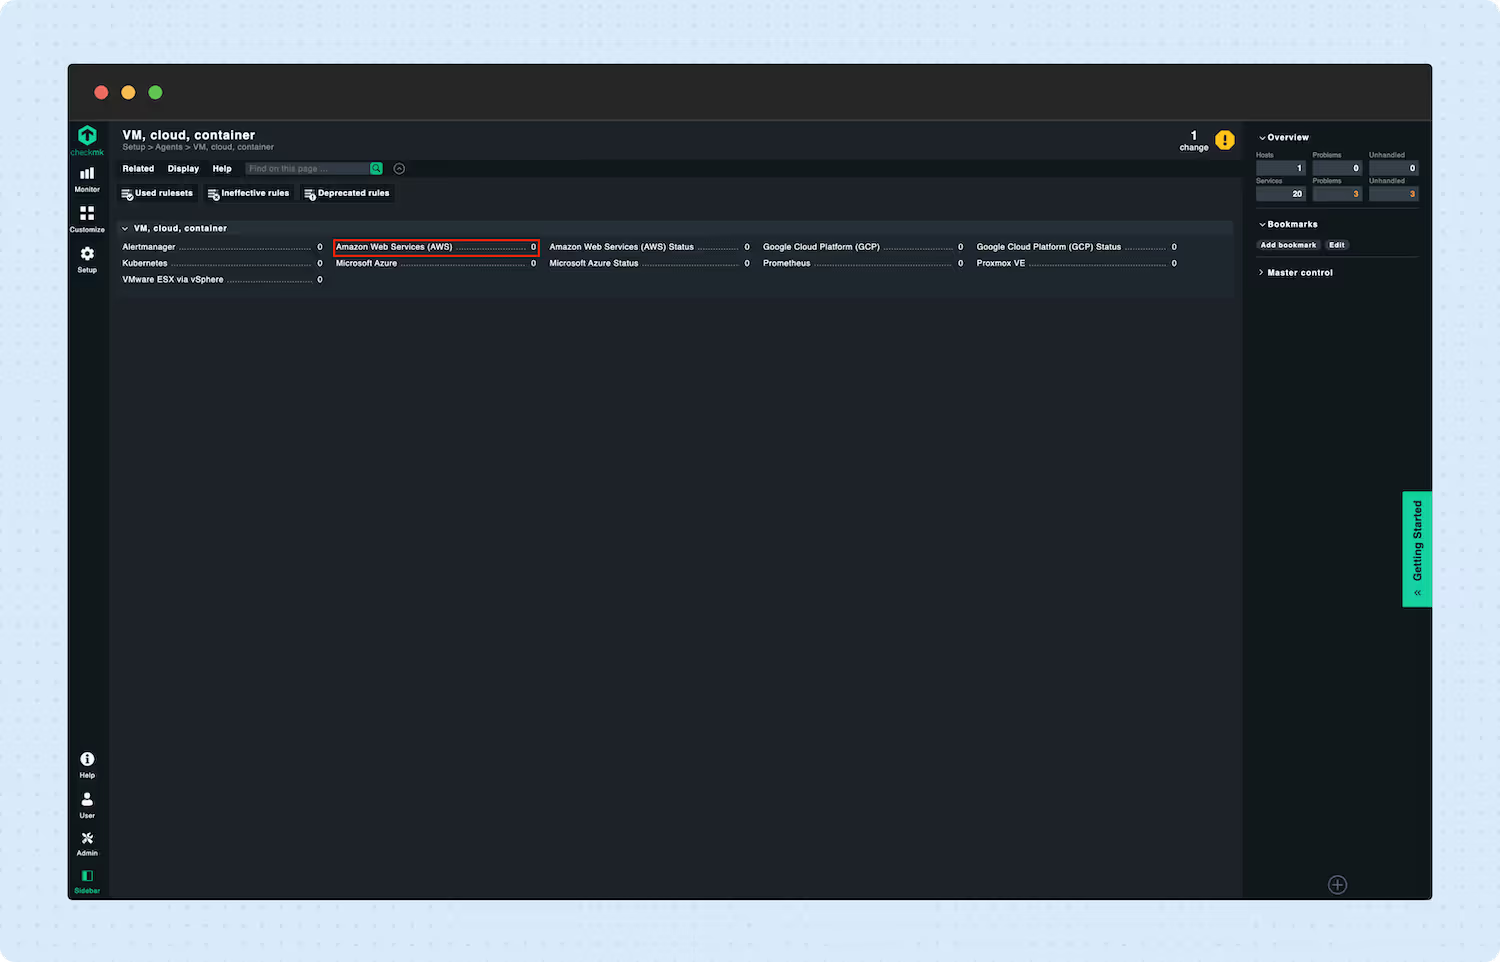
- In the sidebar, navigate to Setup -> VM, cloud, container.

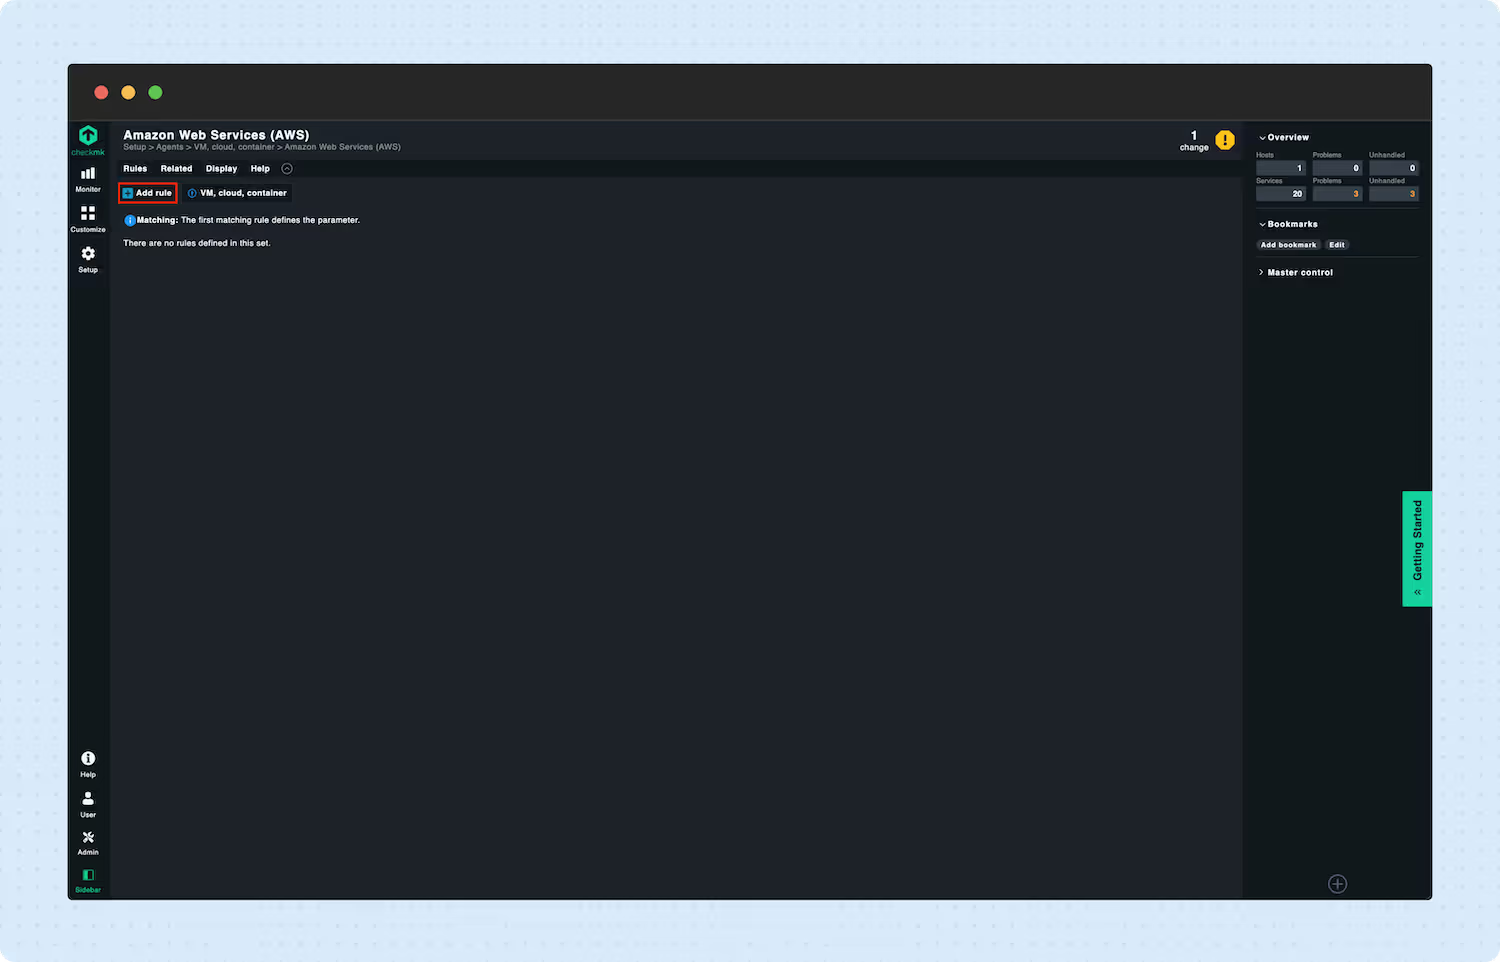
- Now, select Amazon Web Services (AWS).
- Click Add rule.
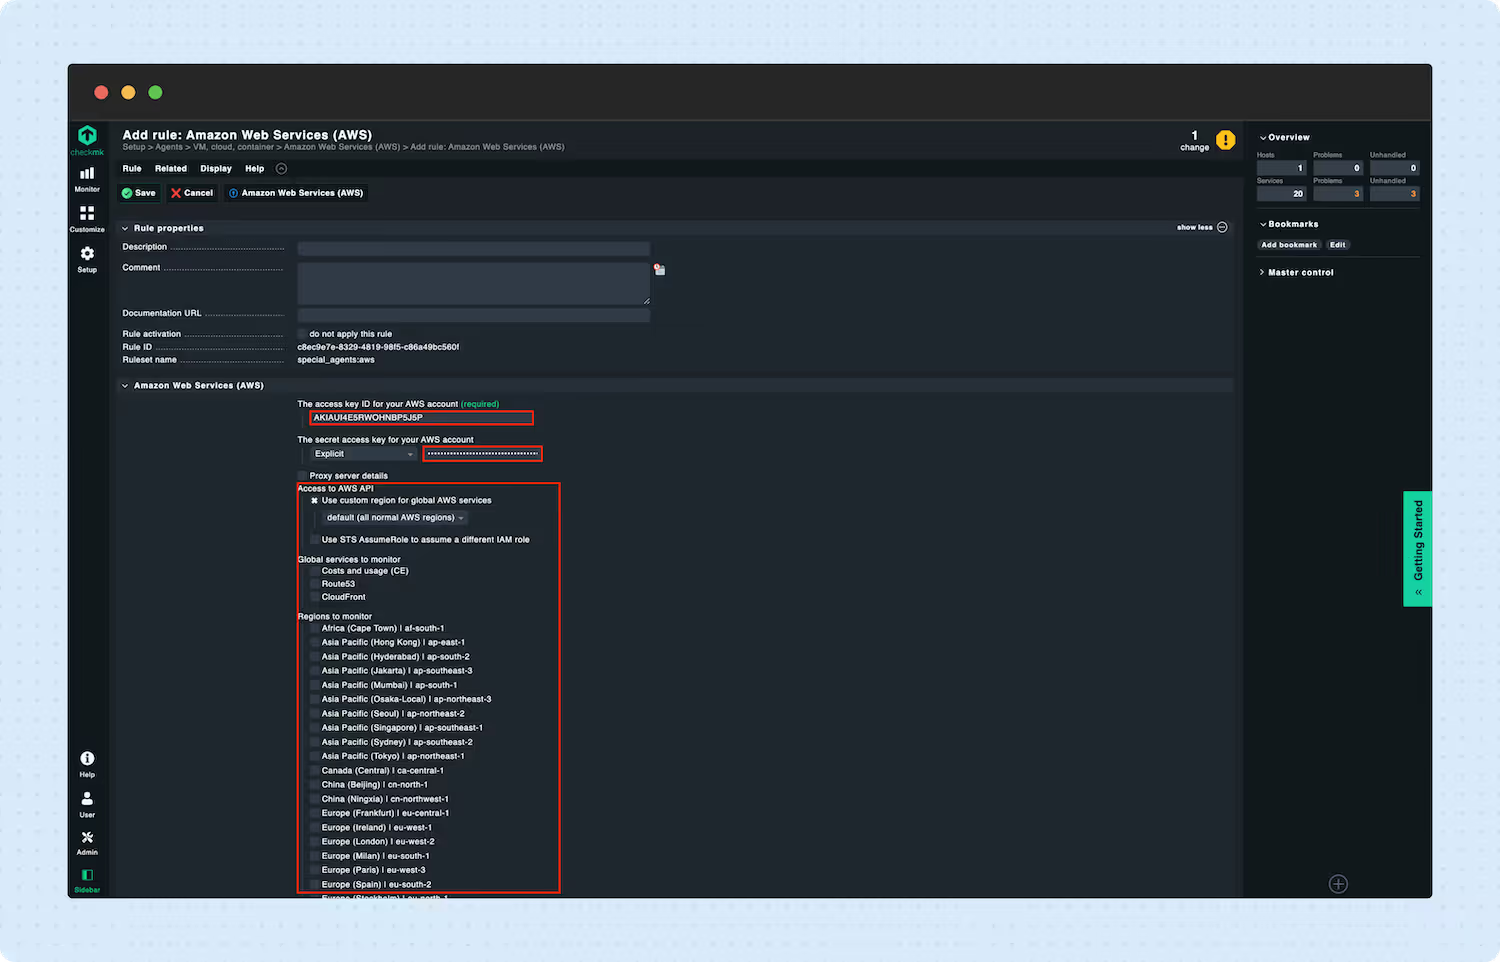
- Enter the access key ID and the secret access key from your AWS account into the corresponding fields.
- Select the options you want to monitor.
- Now, in the sidebar, navigate to Setup -> Hosts.
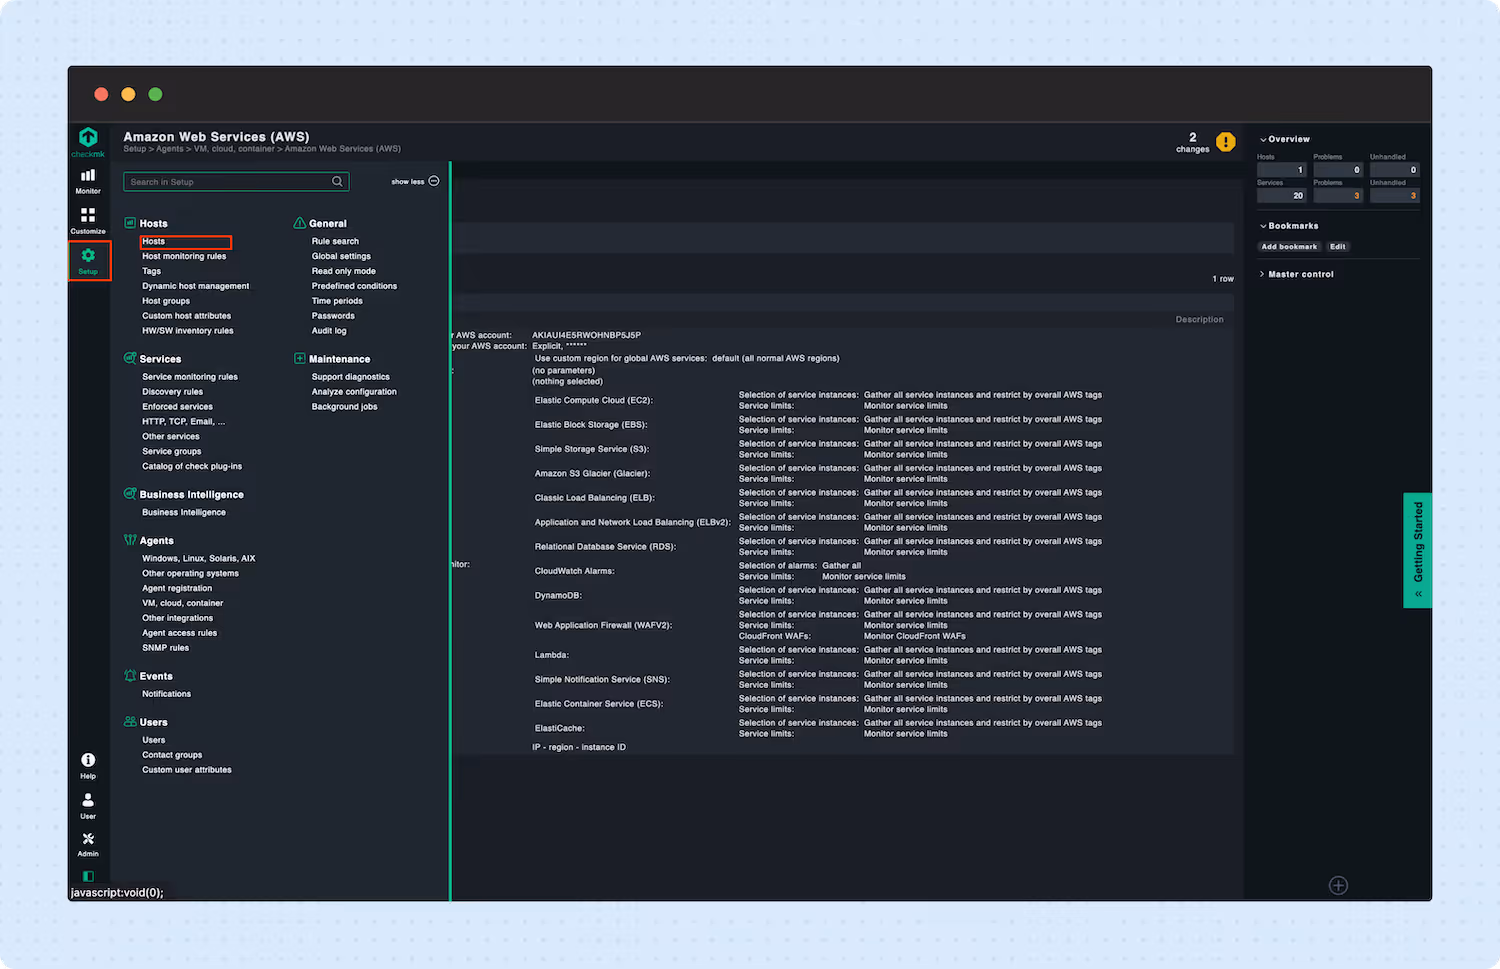
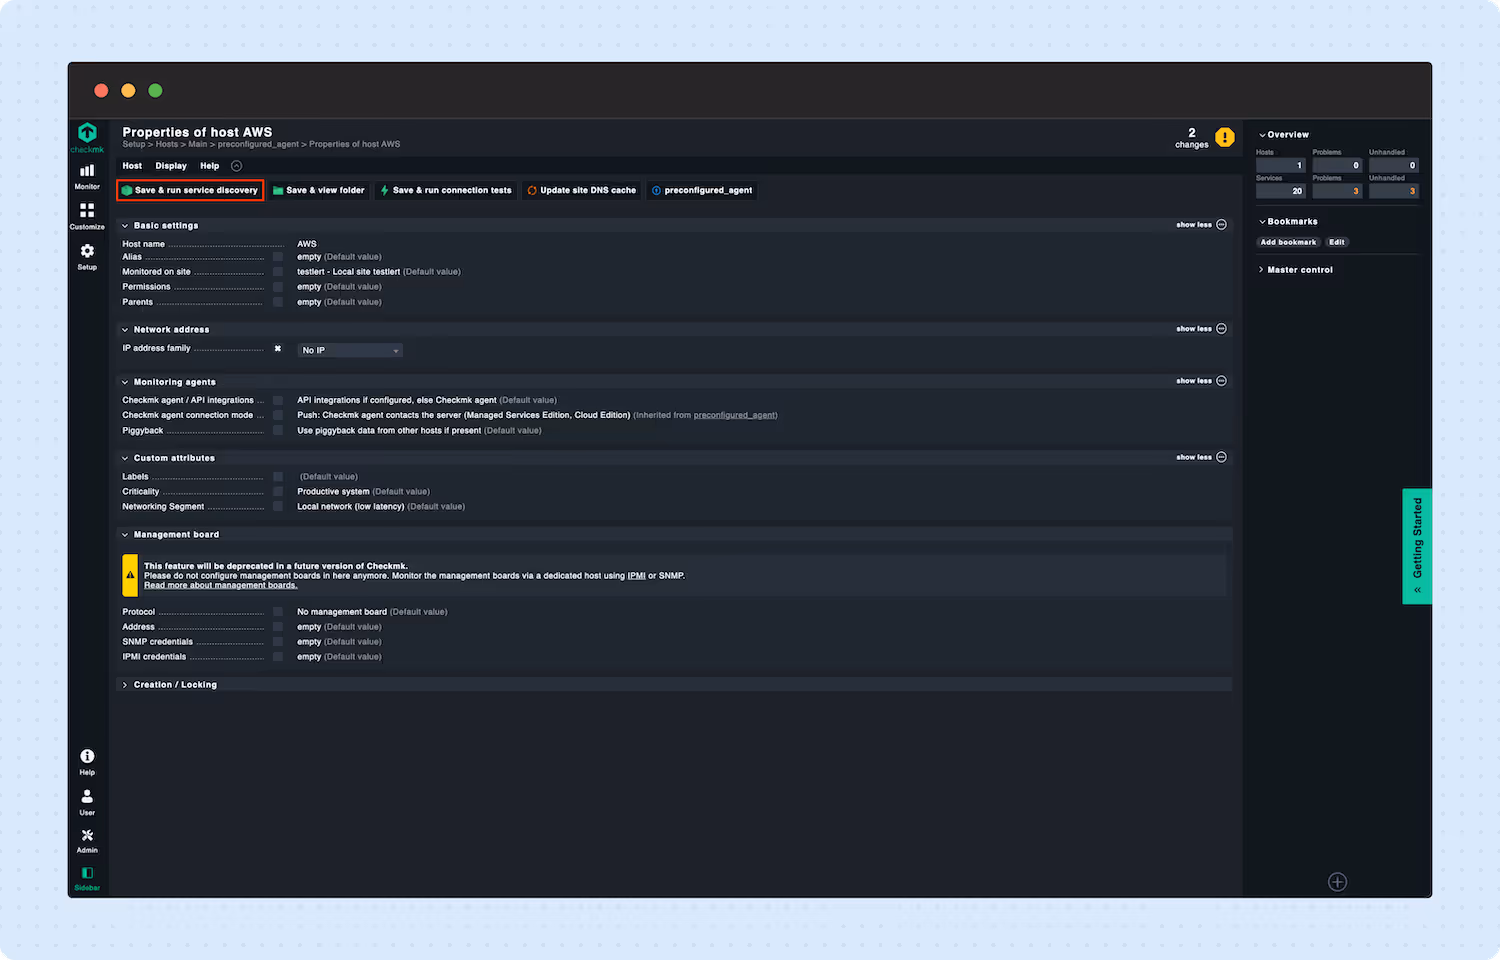
- Select the previously created host.
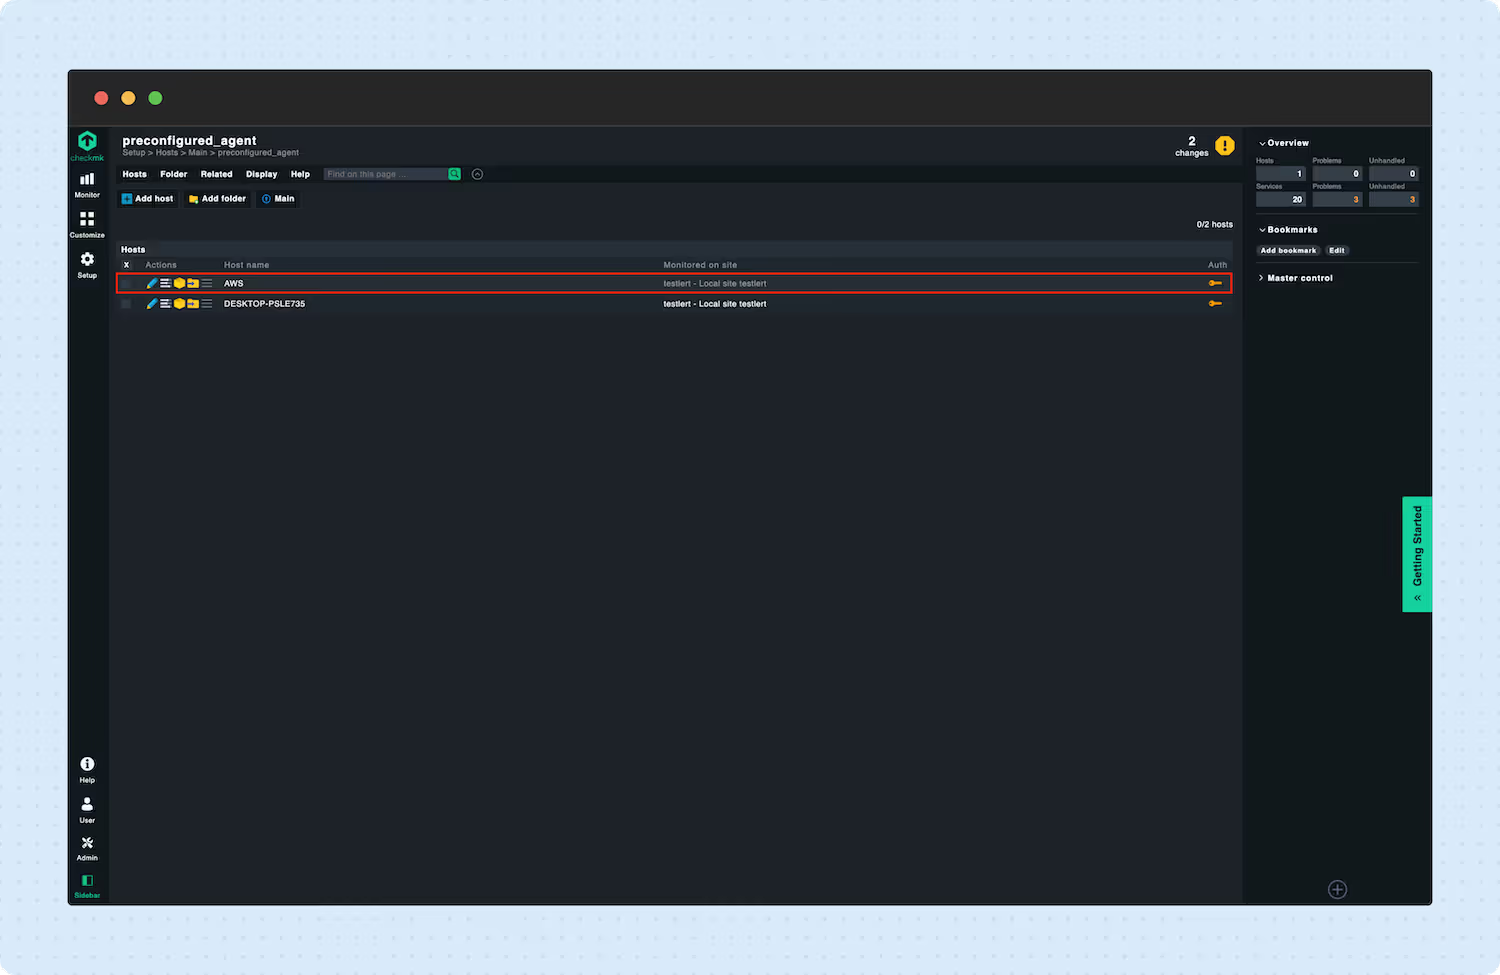
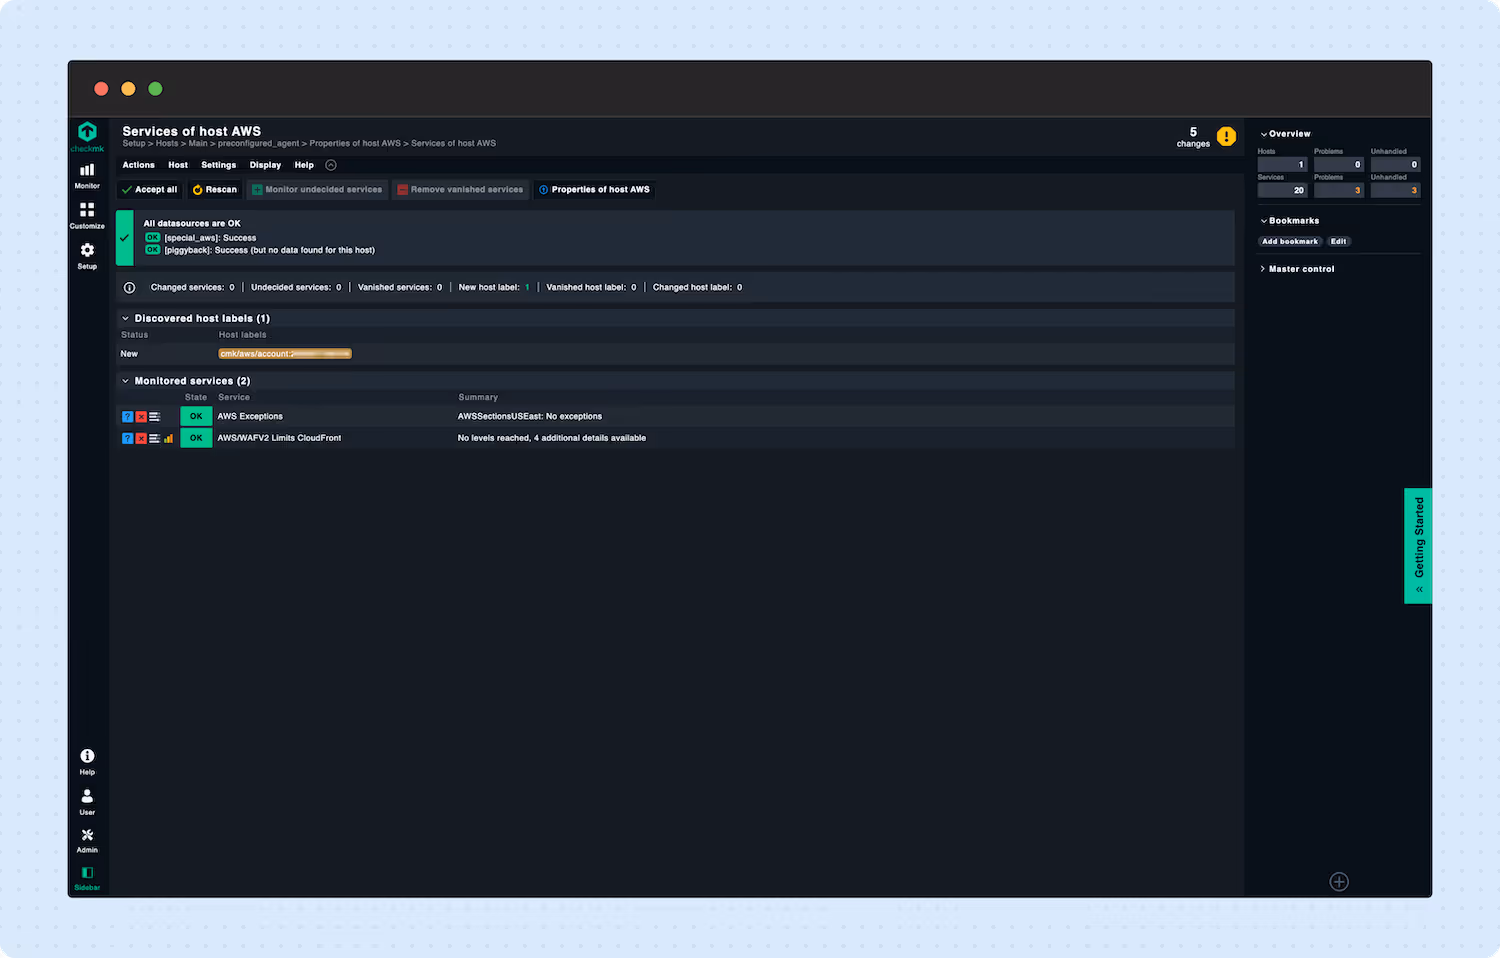
- Click Save & run service discovery.
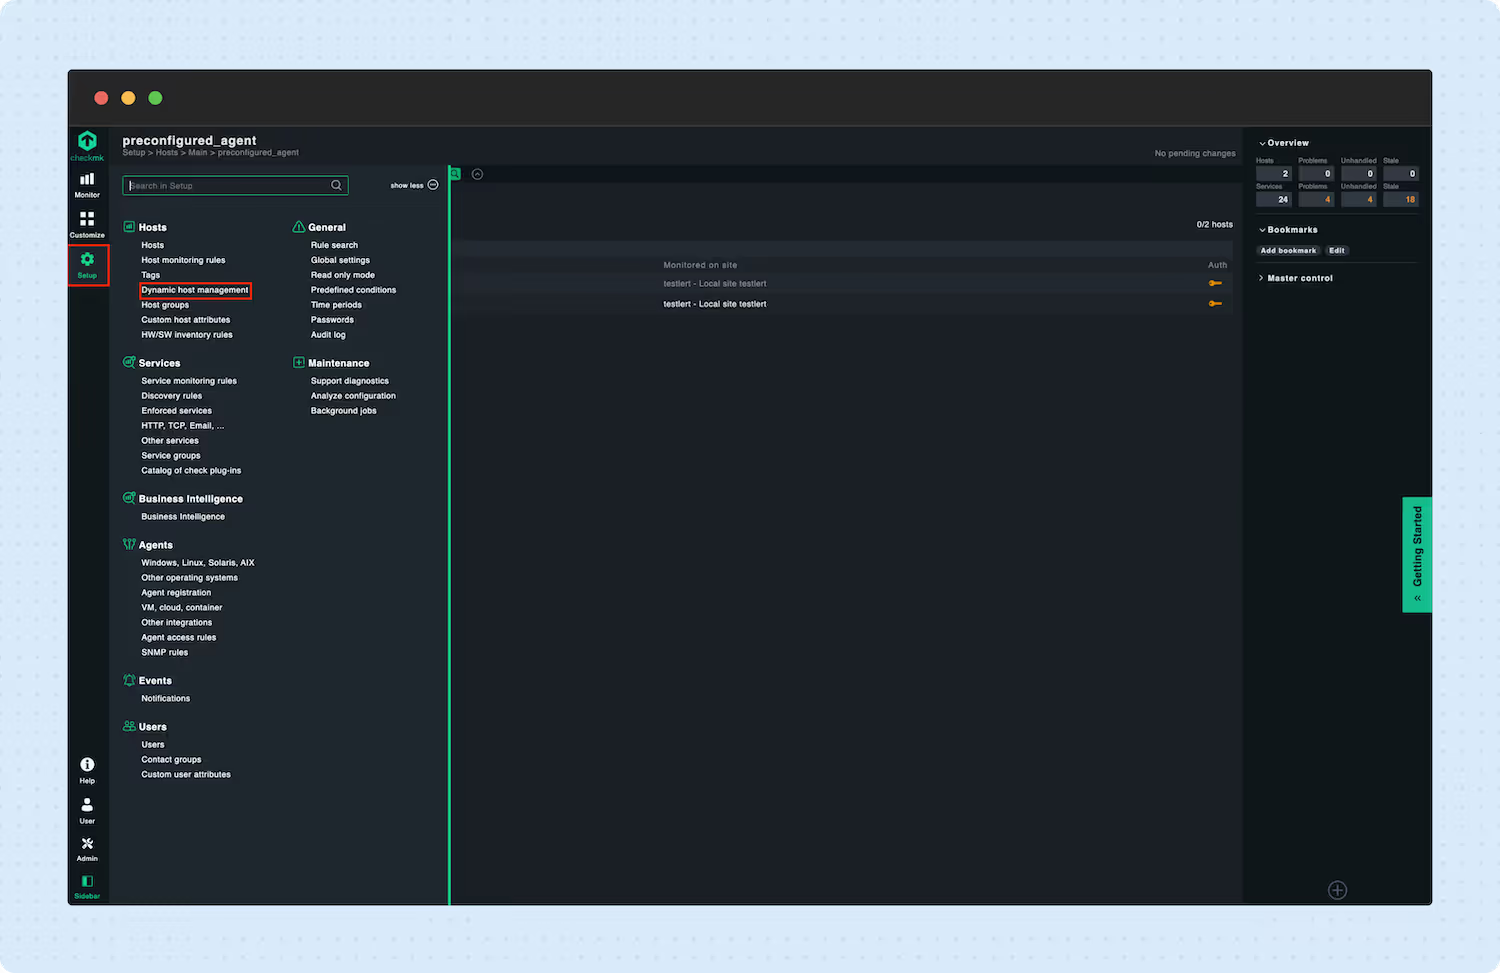
- Navigate to Setup -> Dynamic host management.
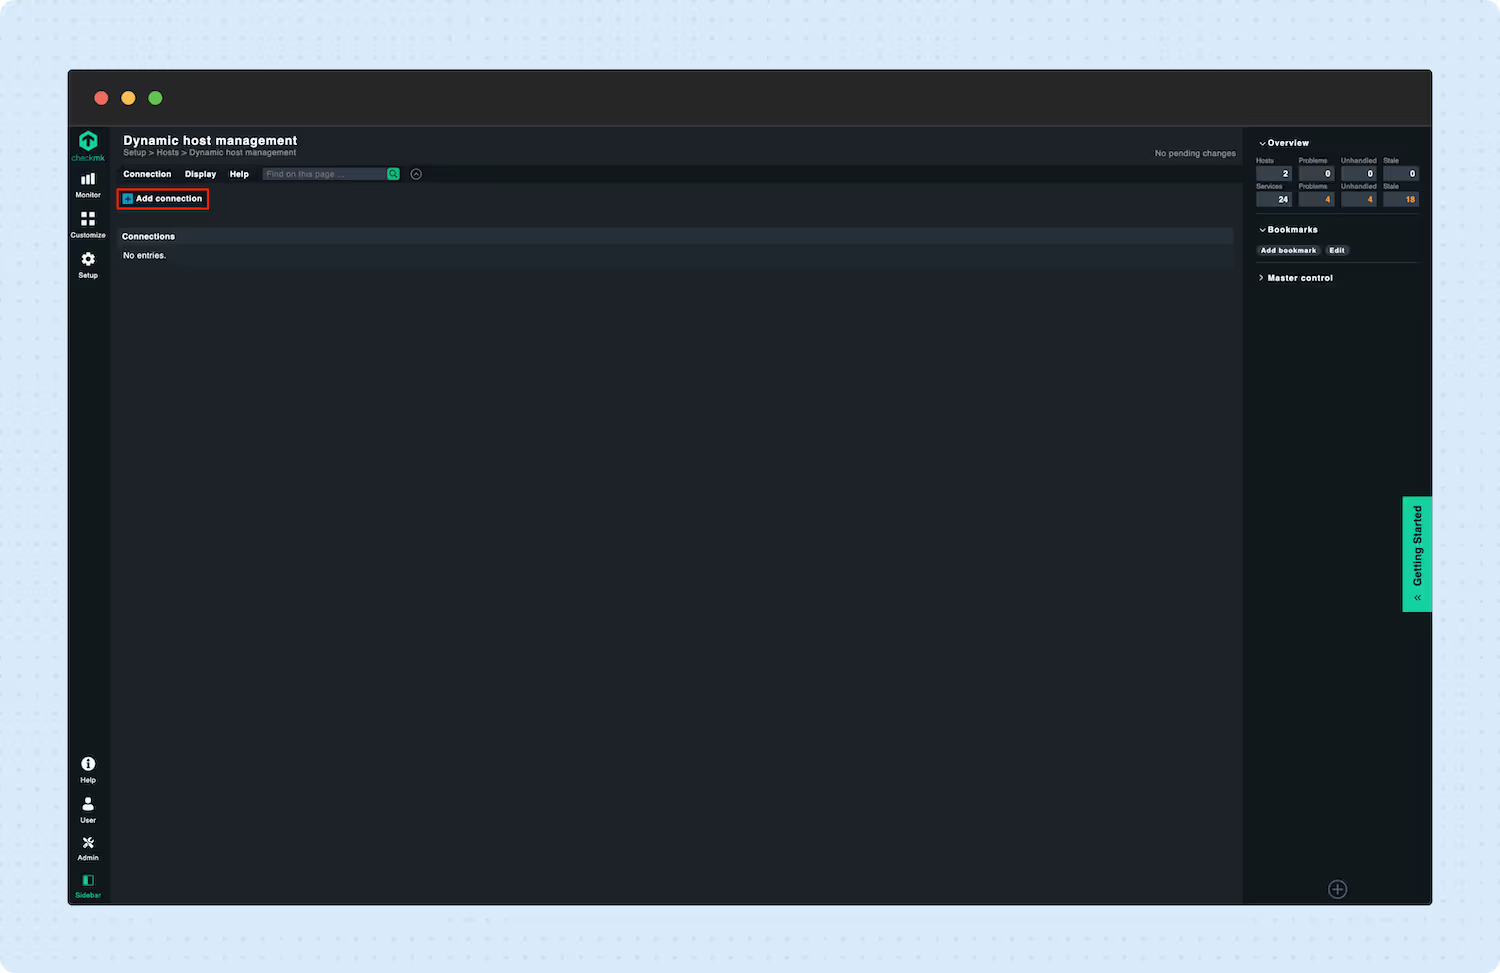
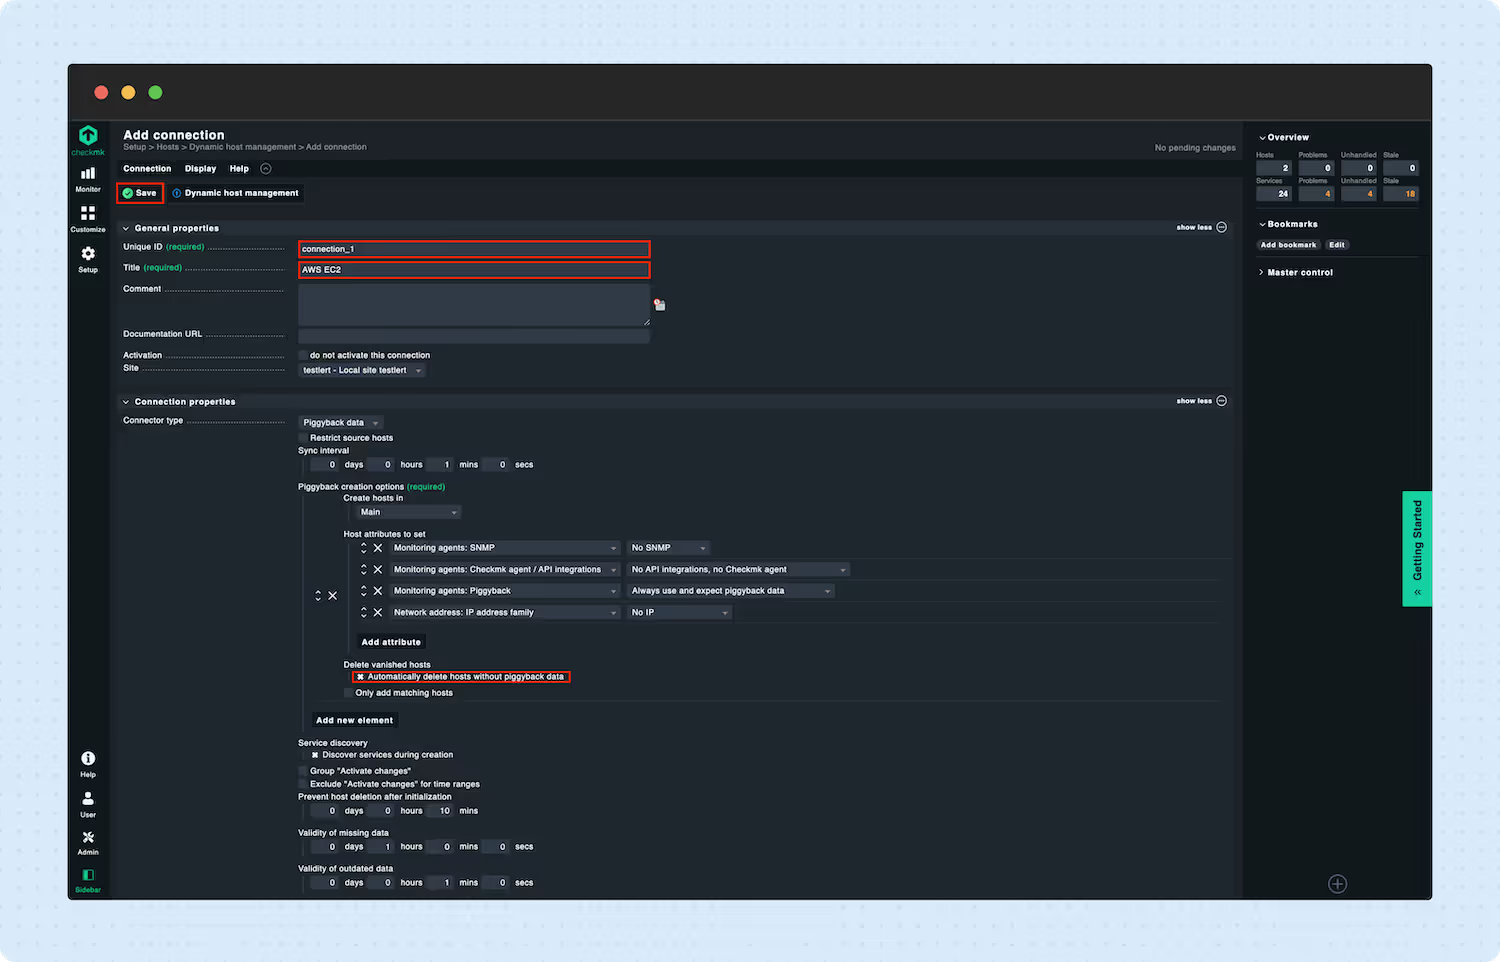
- Click Add connection.
- Enter a Unique ID and Title in the corresponding fields.
- Enable ‘Automatically delete hosts without piggyback’ in the Delete vanished hosts settings.
- Save the connection.
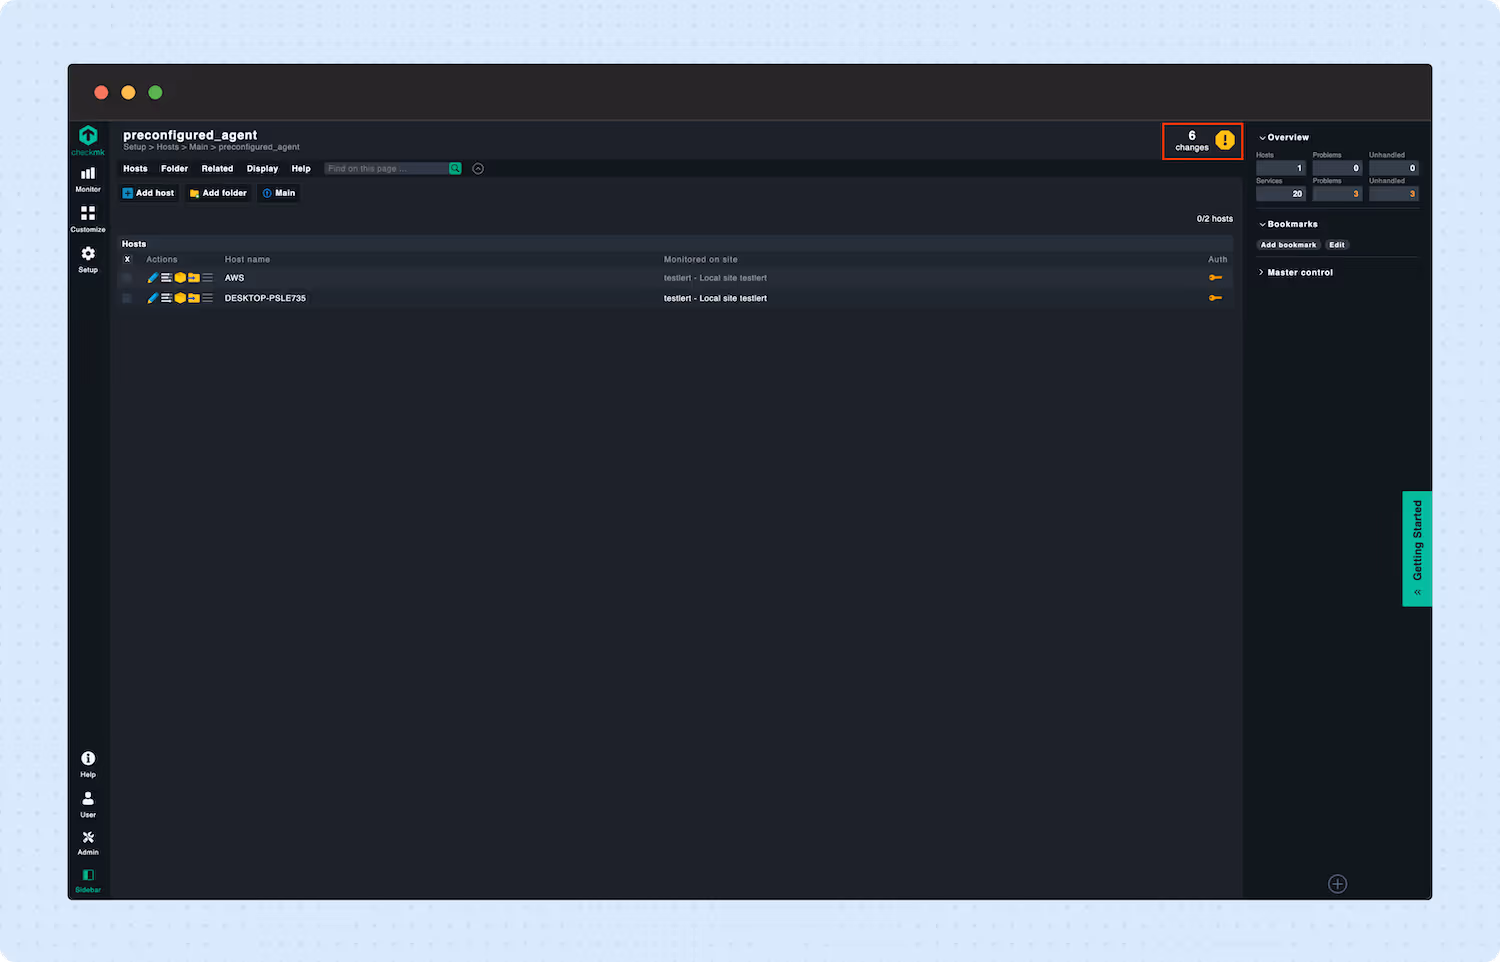
- To apply the changes made, in the top right corner, click the Changes.
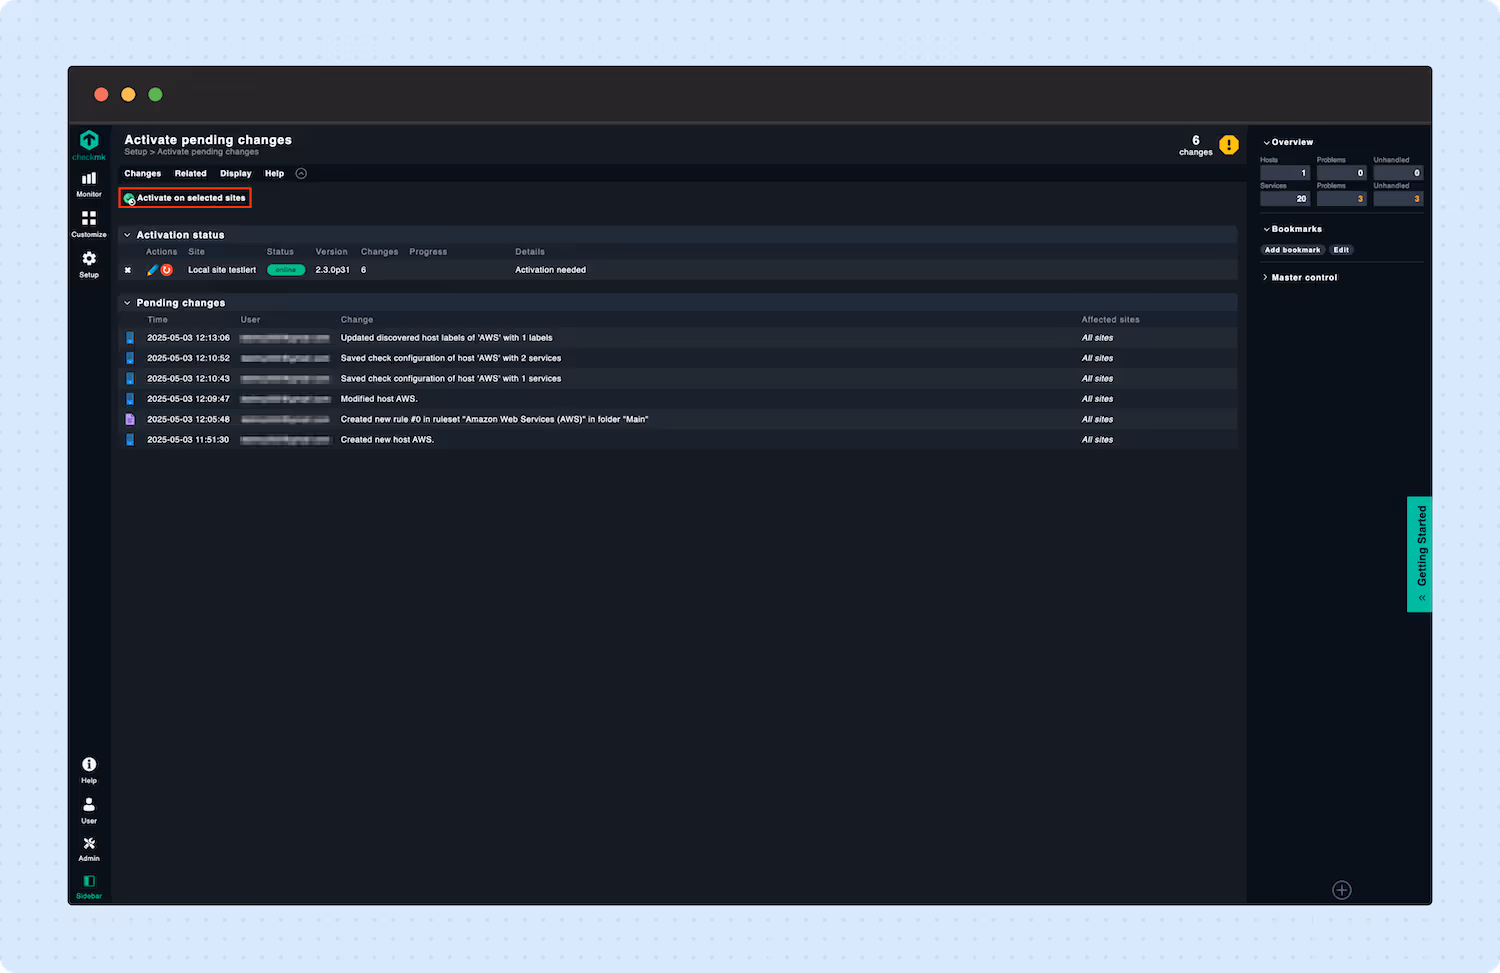
- Now, click Activate on selected sites.
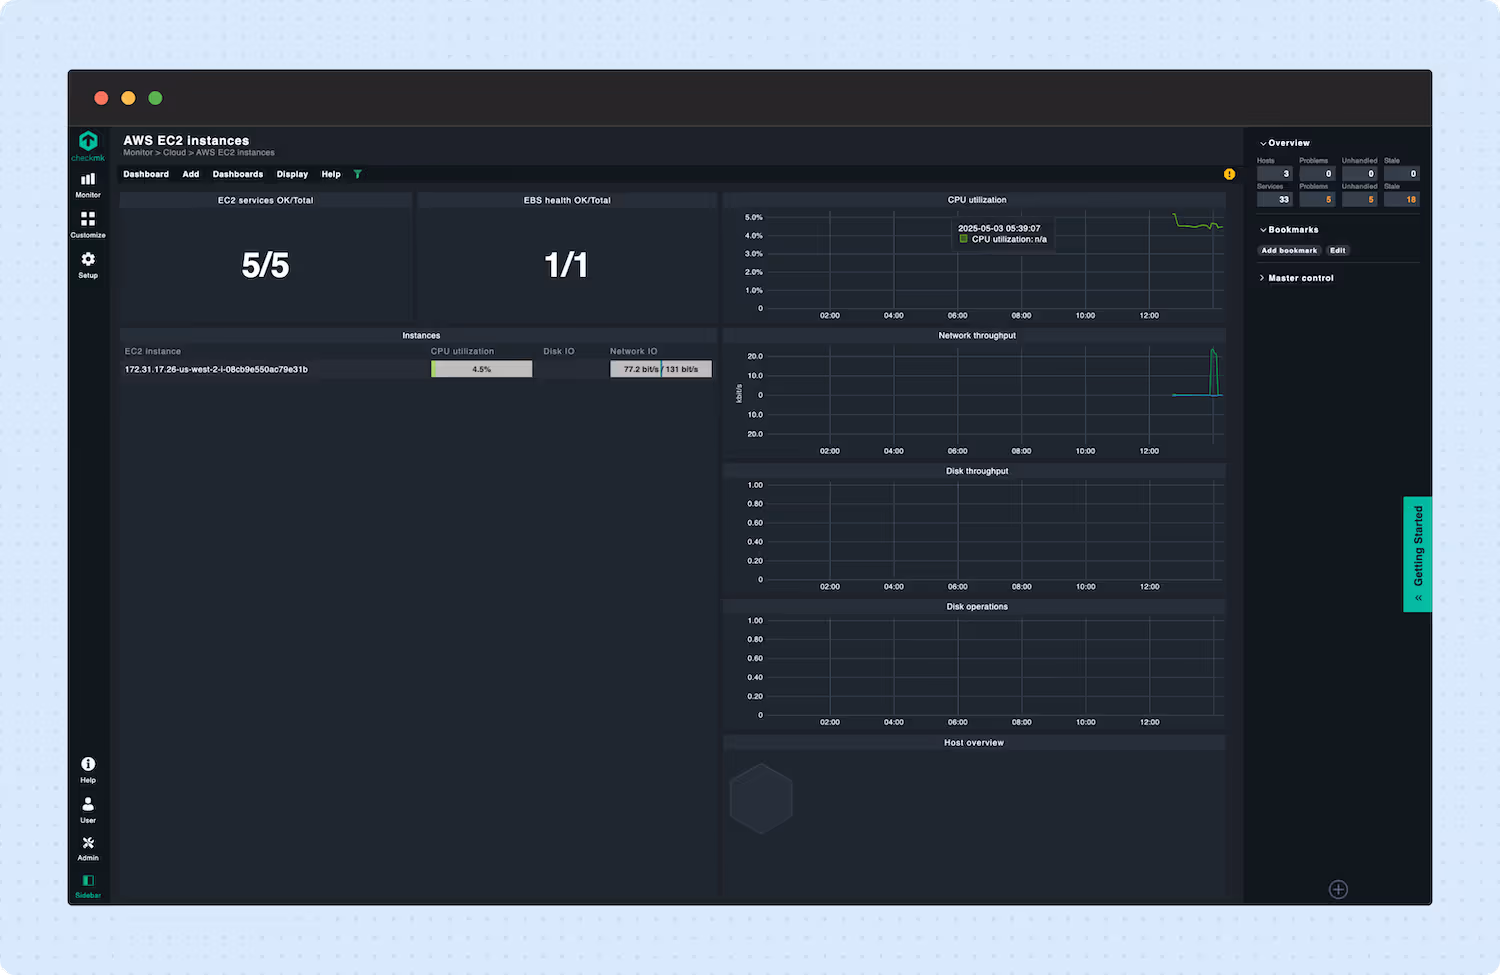
- In the sidebar, navigate to Monitor -> AWS EC2 instances.
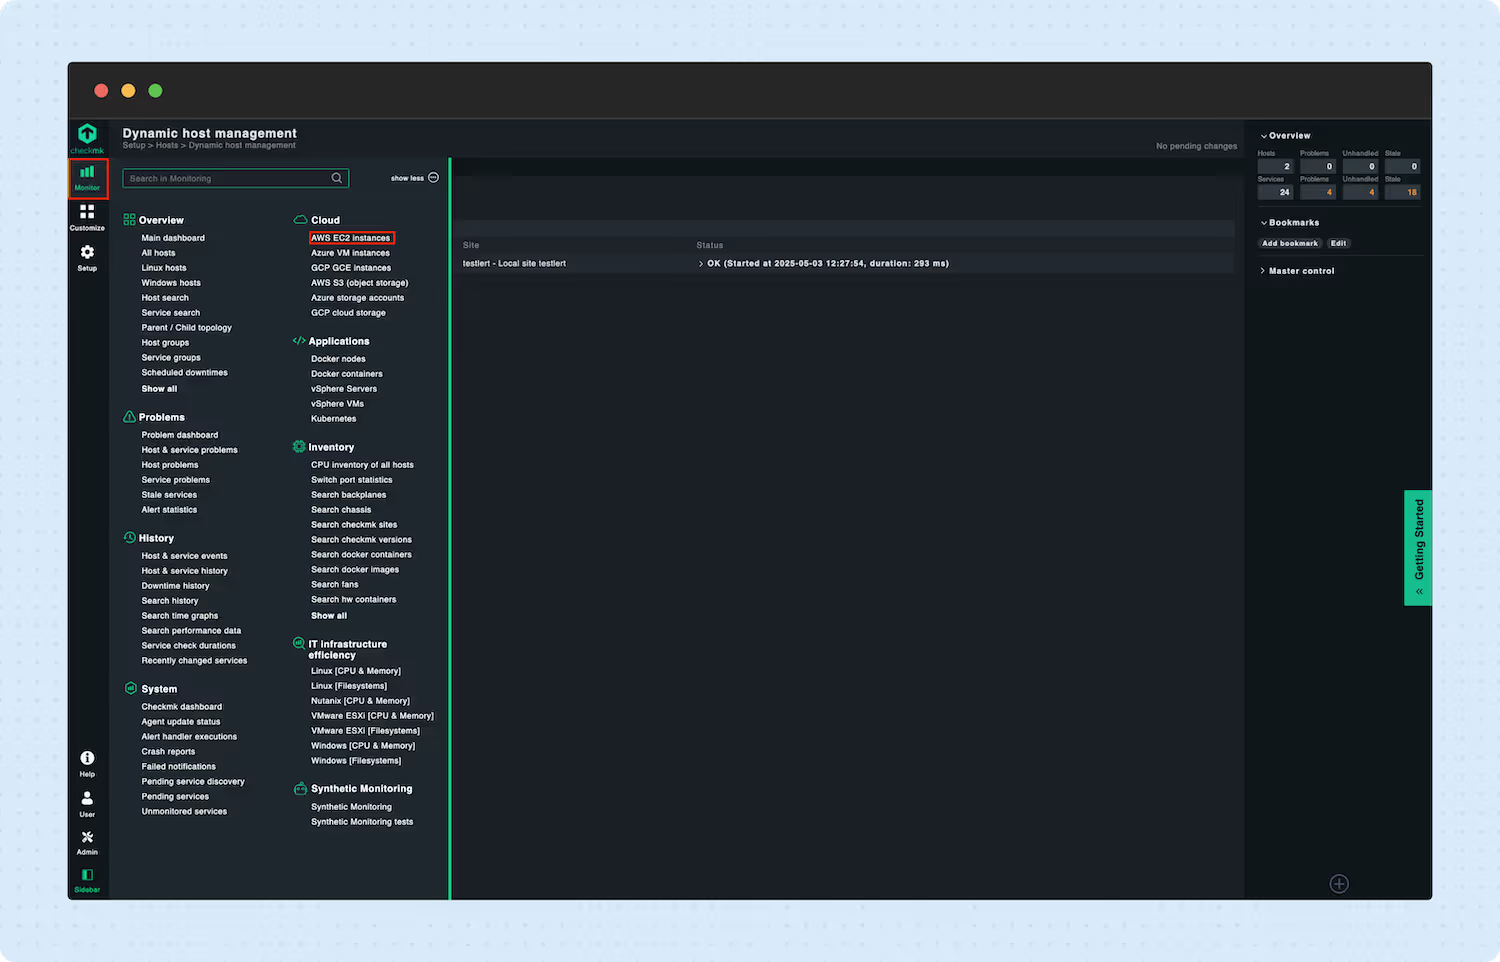
- This view is a general overview of your EC2 Instances.
Stage 4: Build intuitive dashboards to monitor performance
Checkmk dashboards are customizable visual interfaces that provide real-time insights into the health and performance of your cloud and on-premises systems.
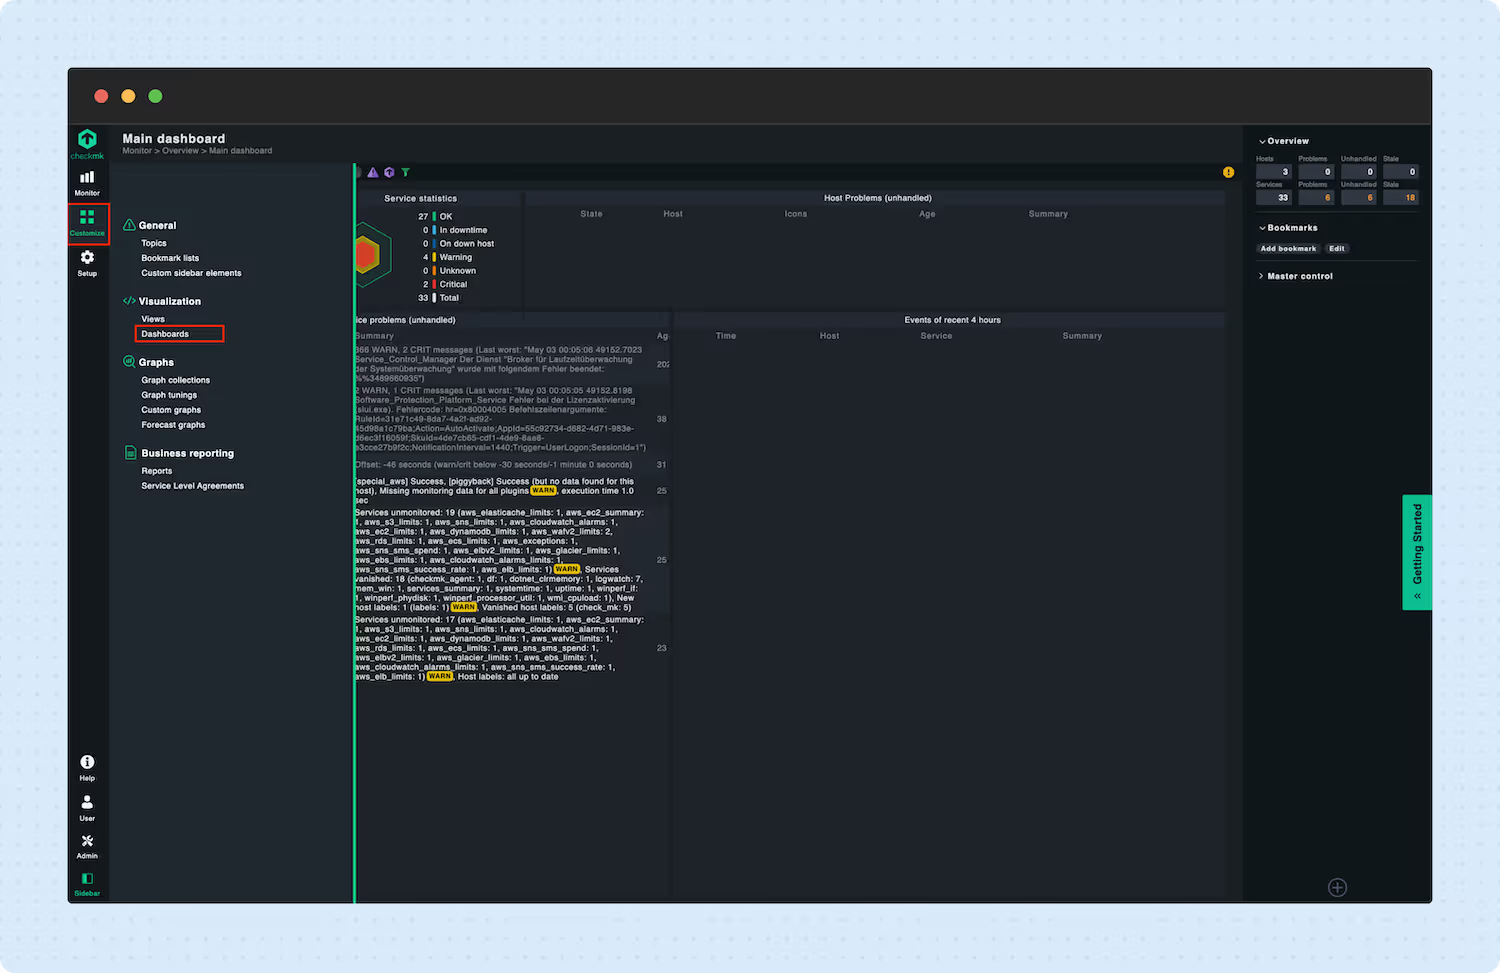
- In the sidebar, navigate to Customize -> Dashboards.
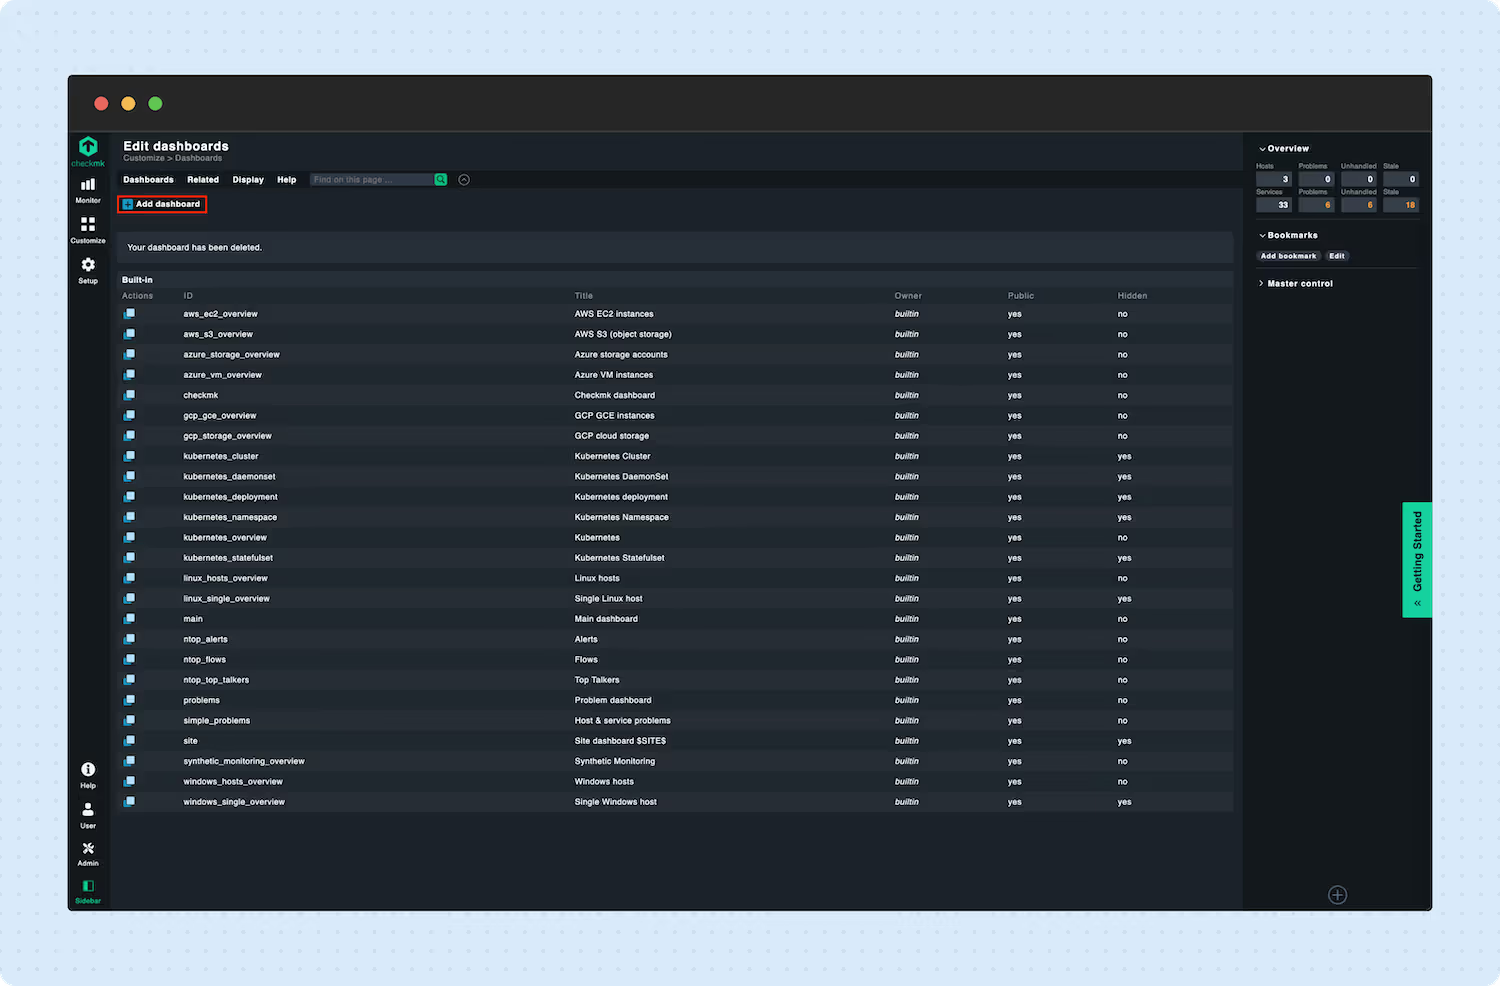
- Click on Add dashboard.
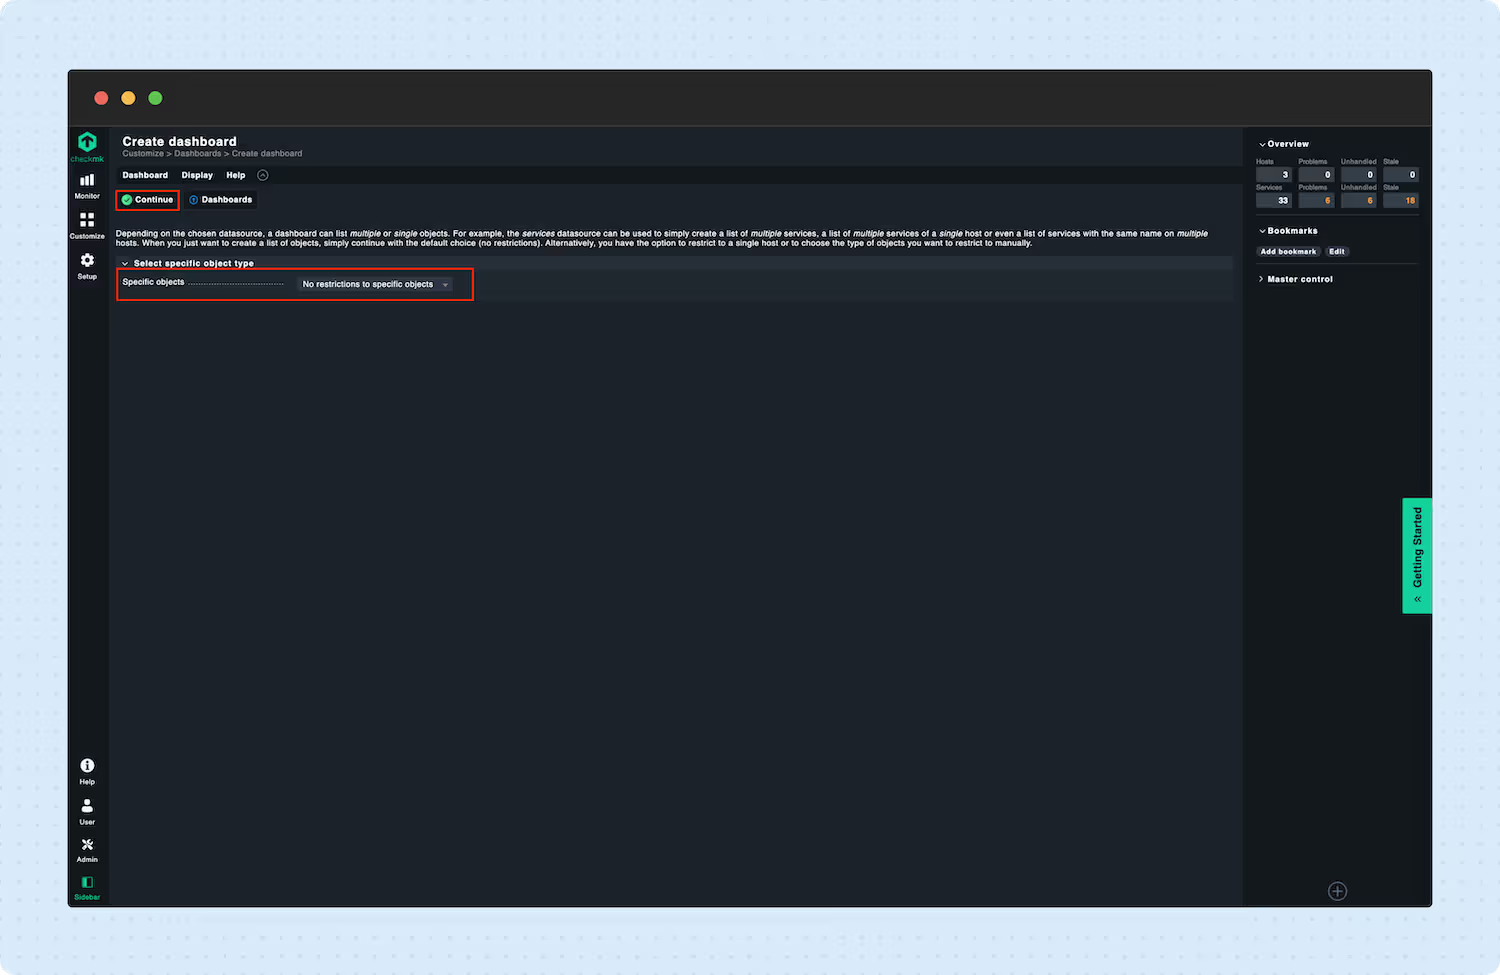
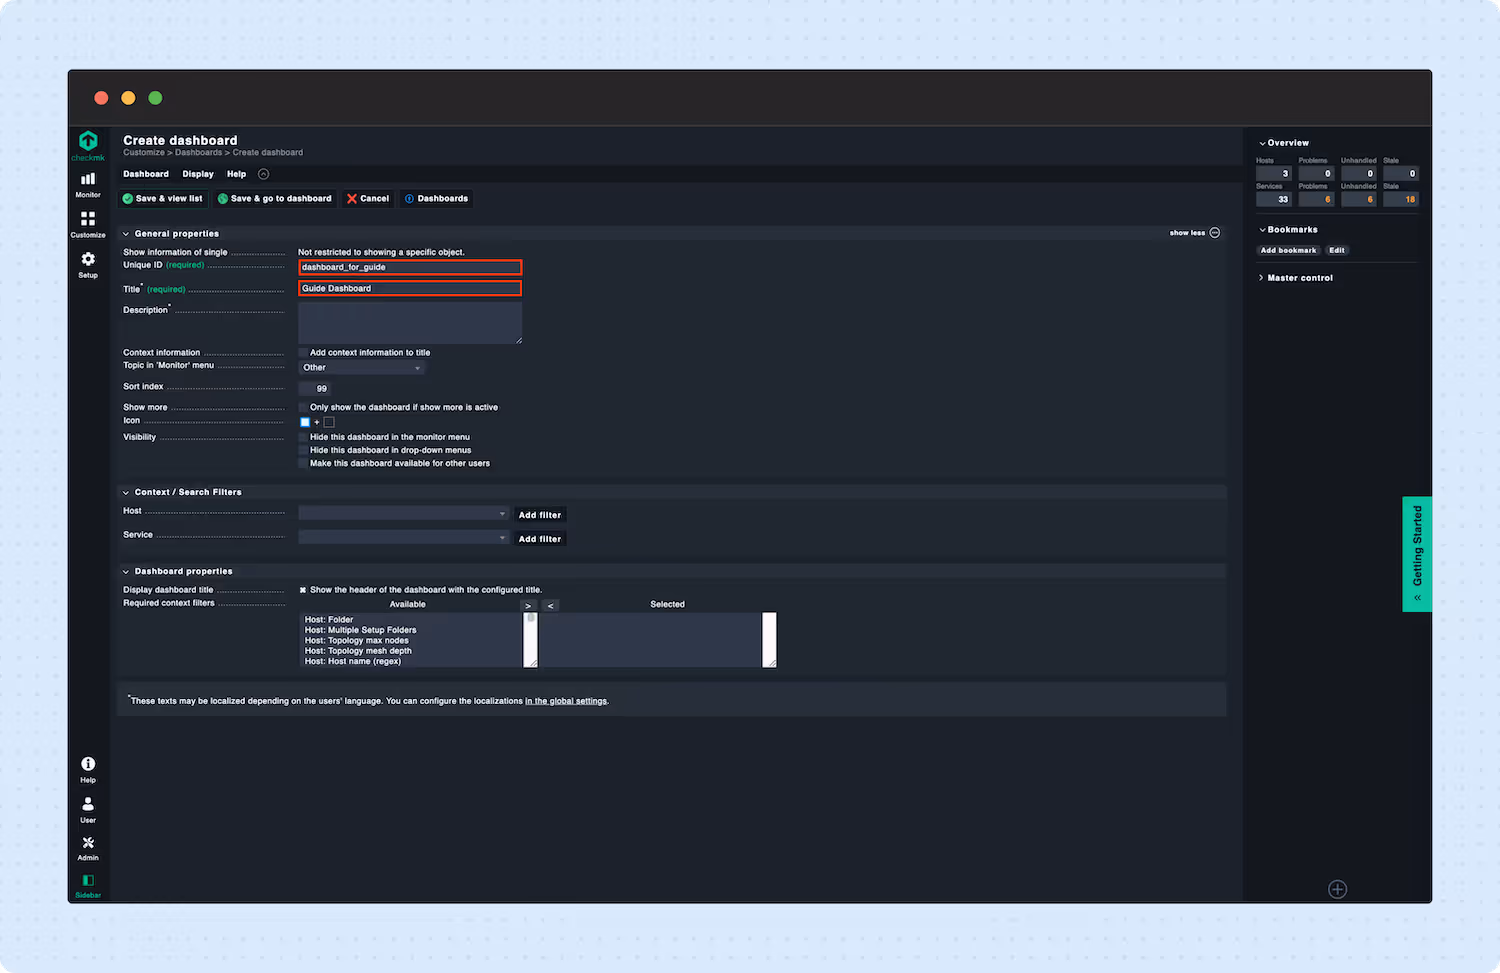
- Select specific objects to which the dashboard is restricted. In this guide, we will set the restriction to: ‘No restrictions to specific objects.’
- Click Continue.
- Enter a Unique ID and Title and click Save & go to dashboard.
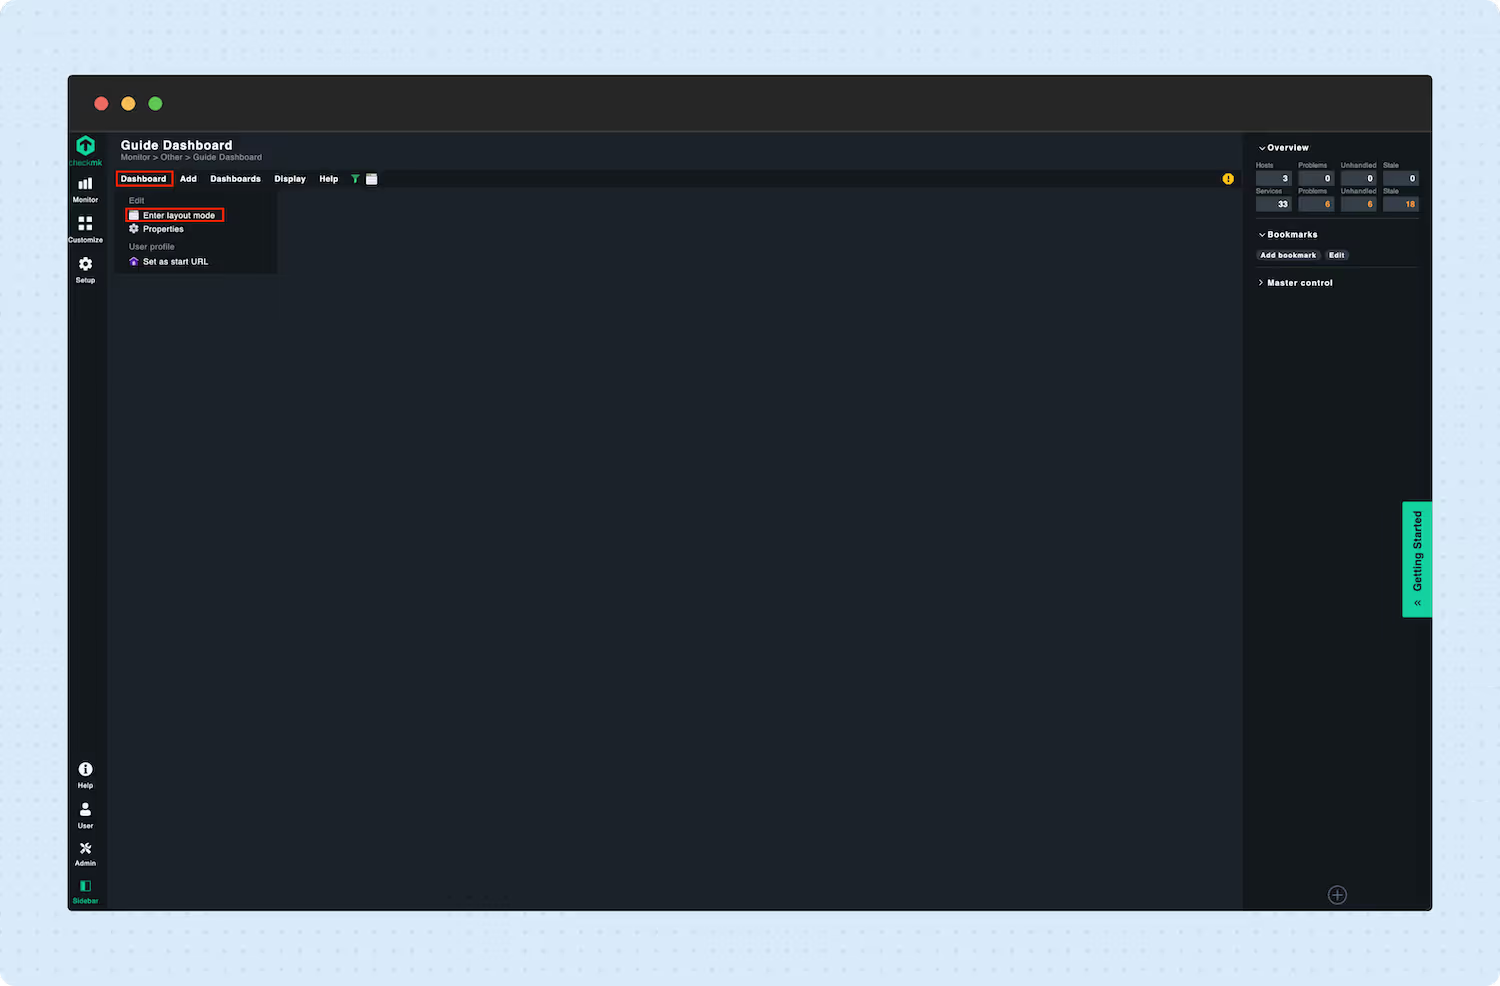
- Now, navigate to Dashboard -> Enter layout mode.
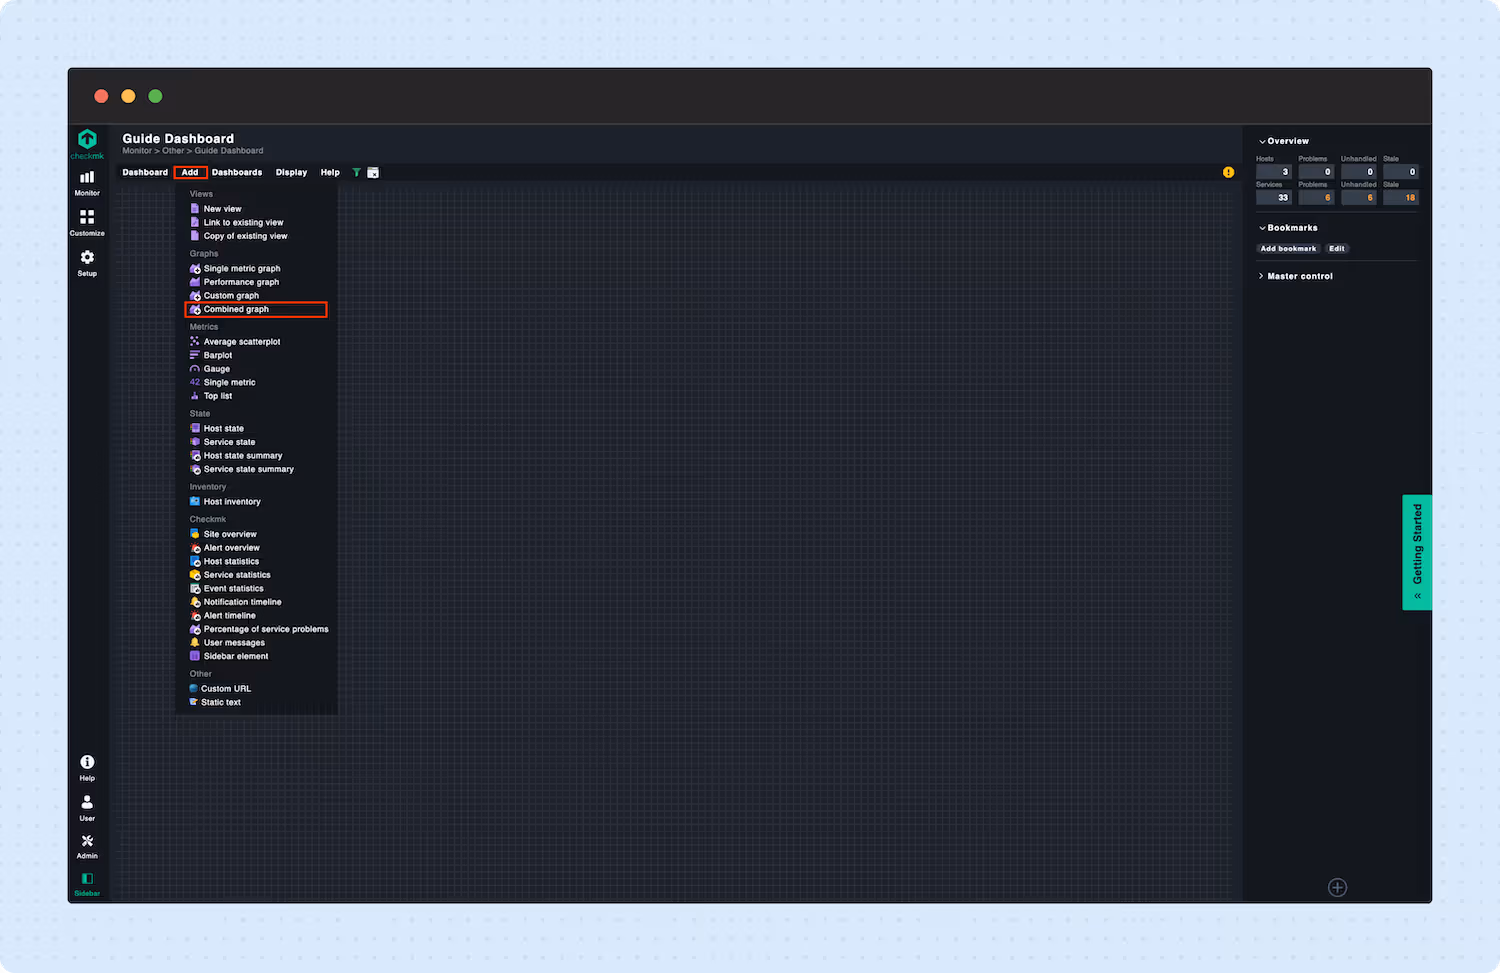
- Navigate to Add -> Combined graph.
- Enter a Custom title for the graph.

- Select the Service filter condition ‘Service (exact match)’ and enter ‘AWS/EC2 CPU utilization’ as the value.
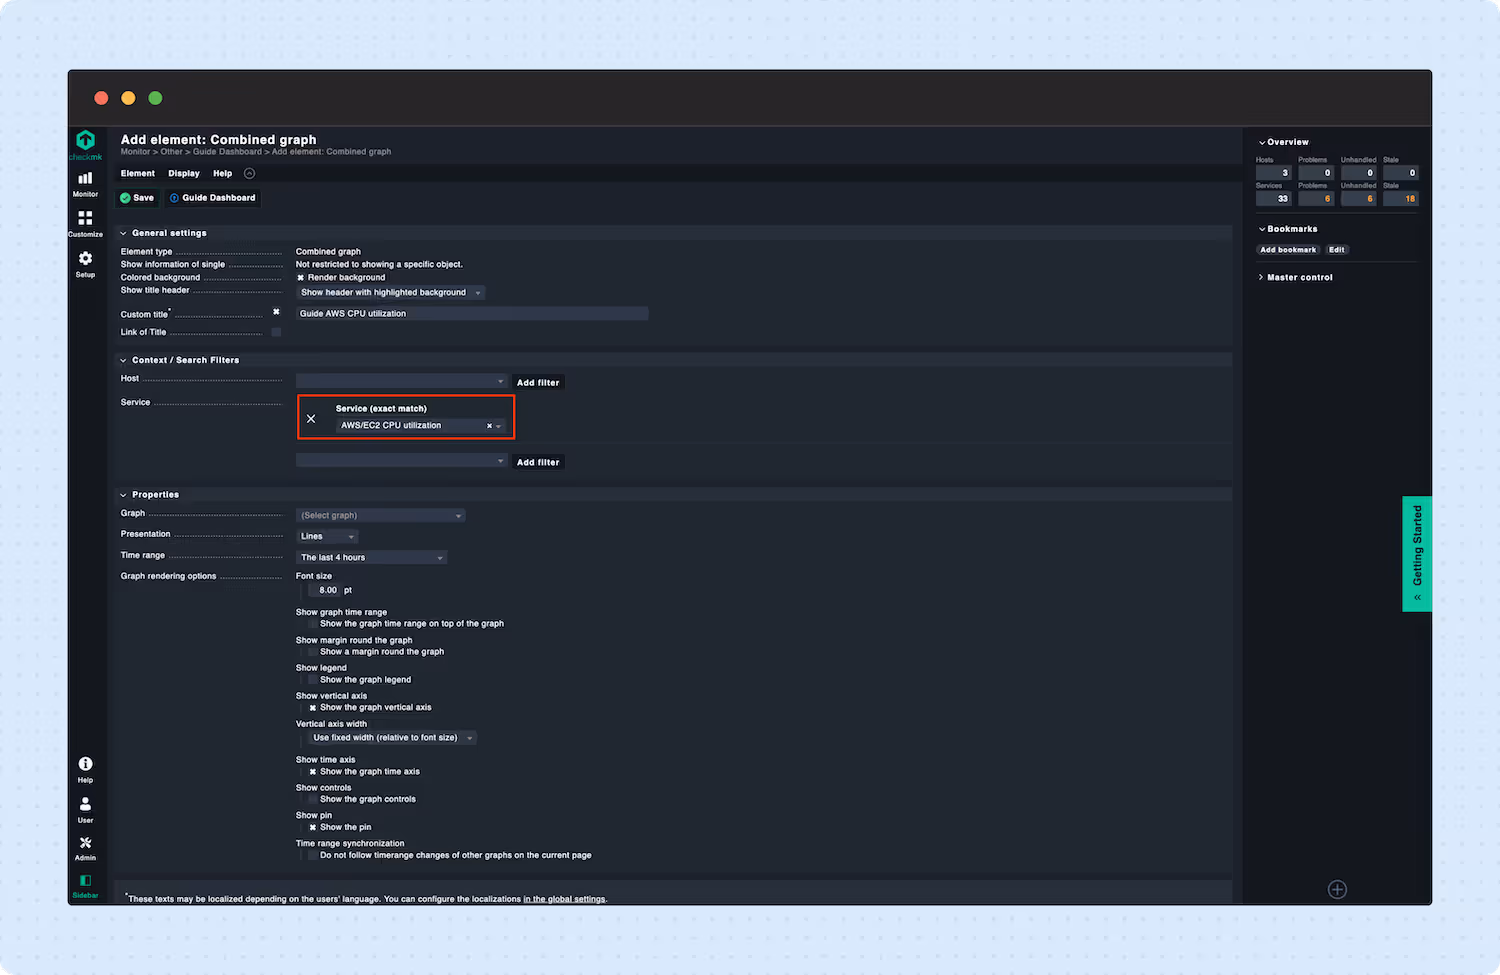
- Select ‘CPU utilization’ as Graph and select a desired Time range.
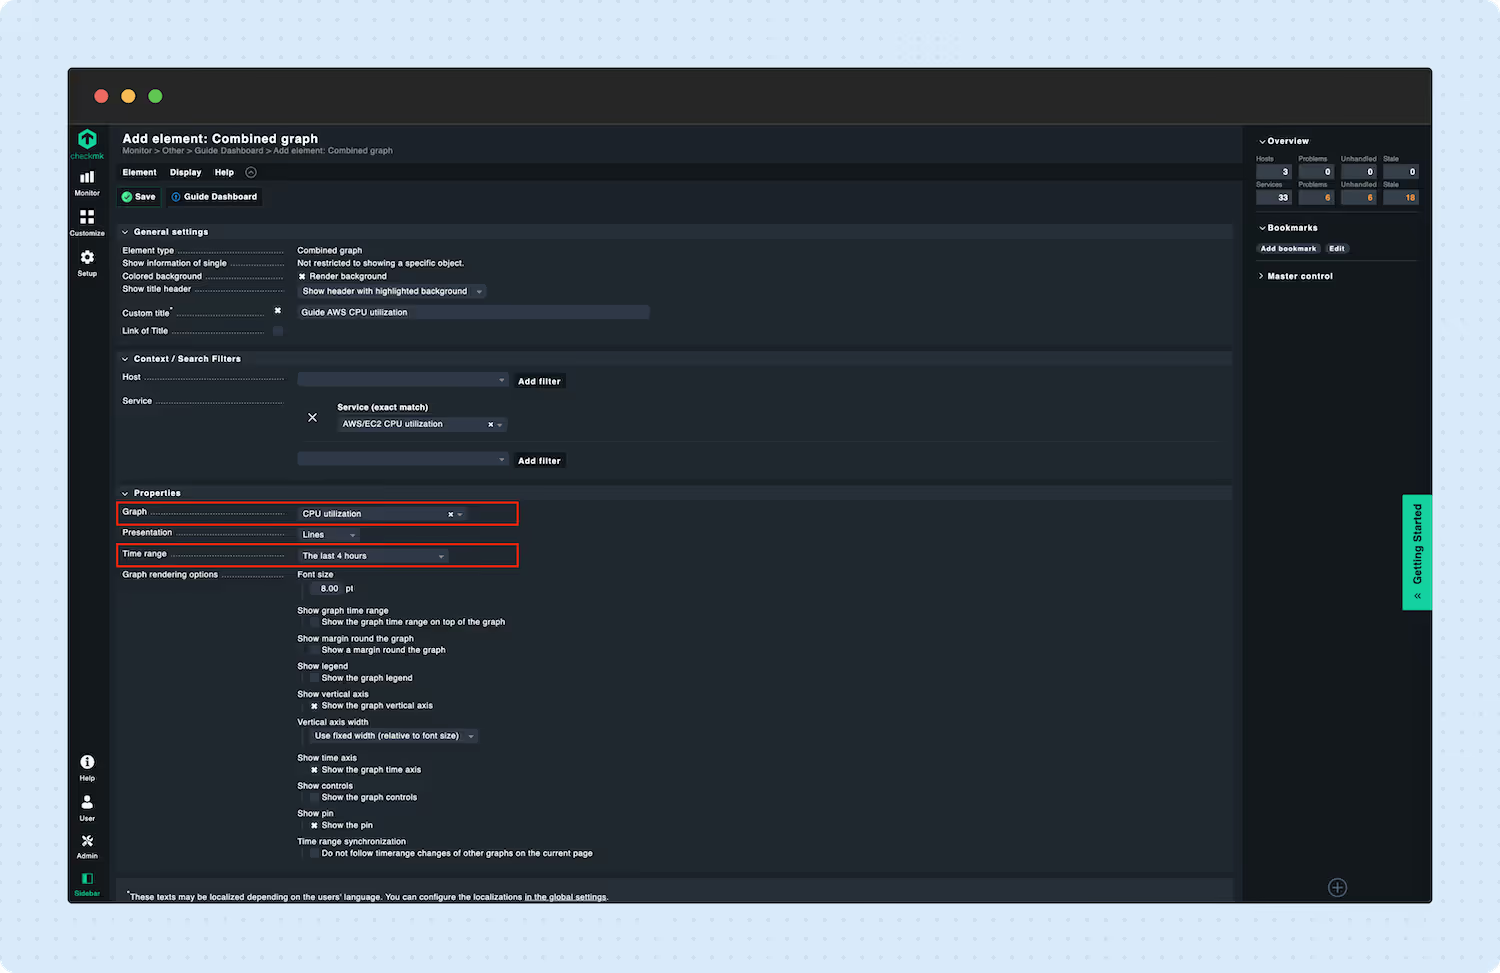
- Click Save.
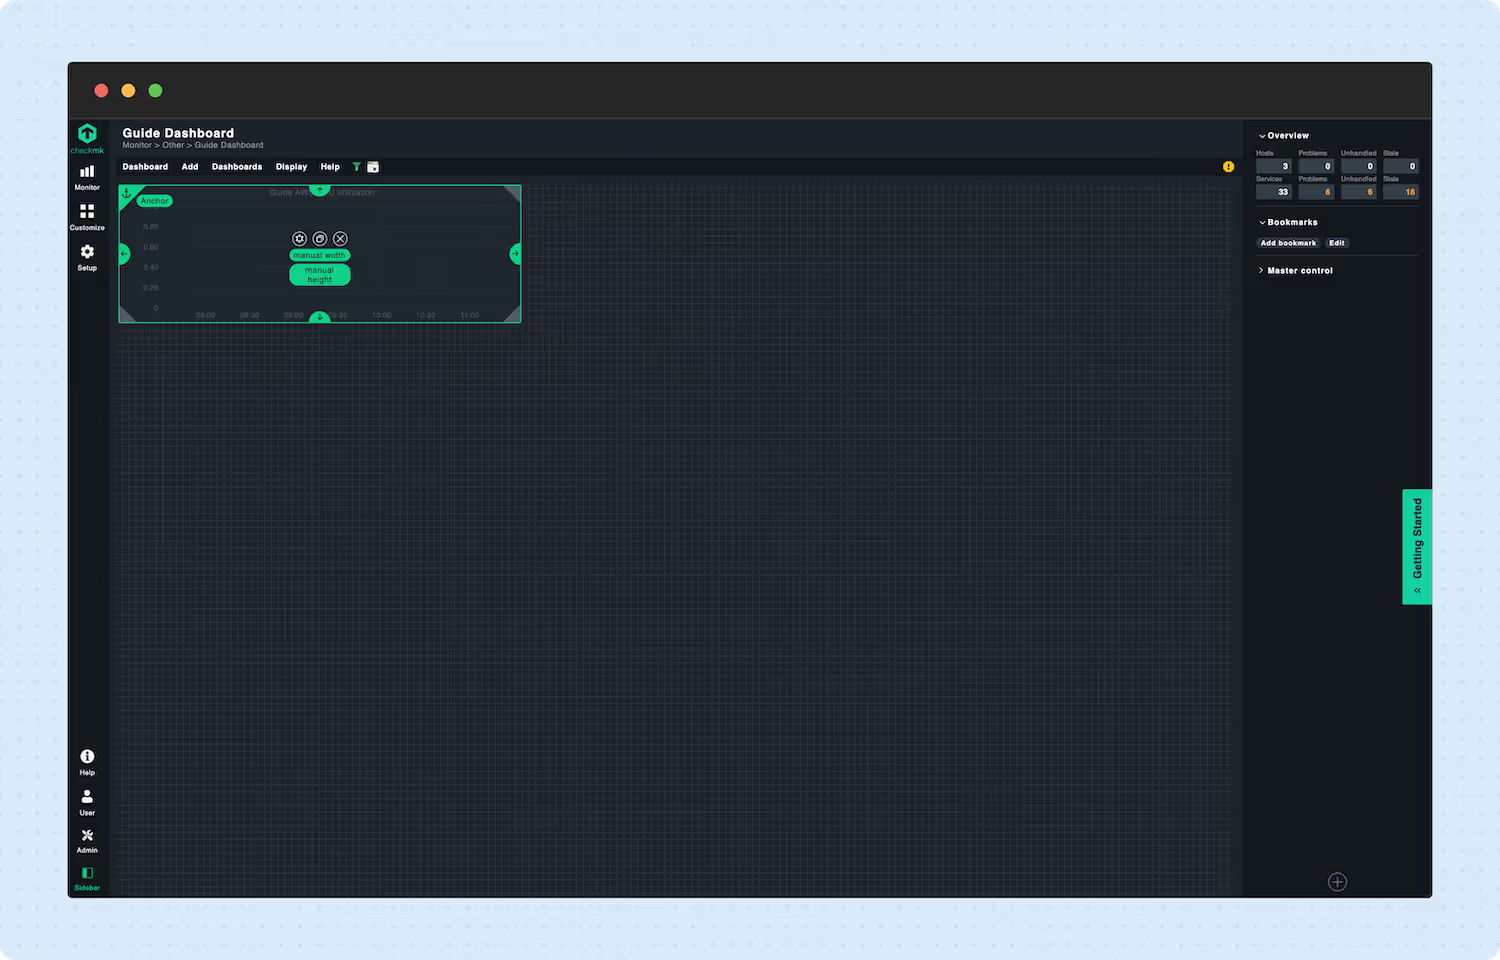
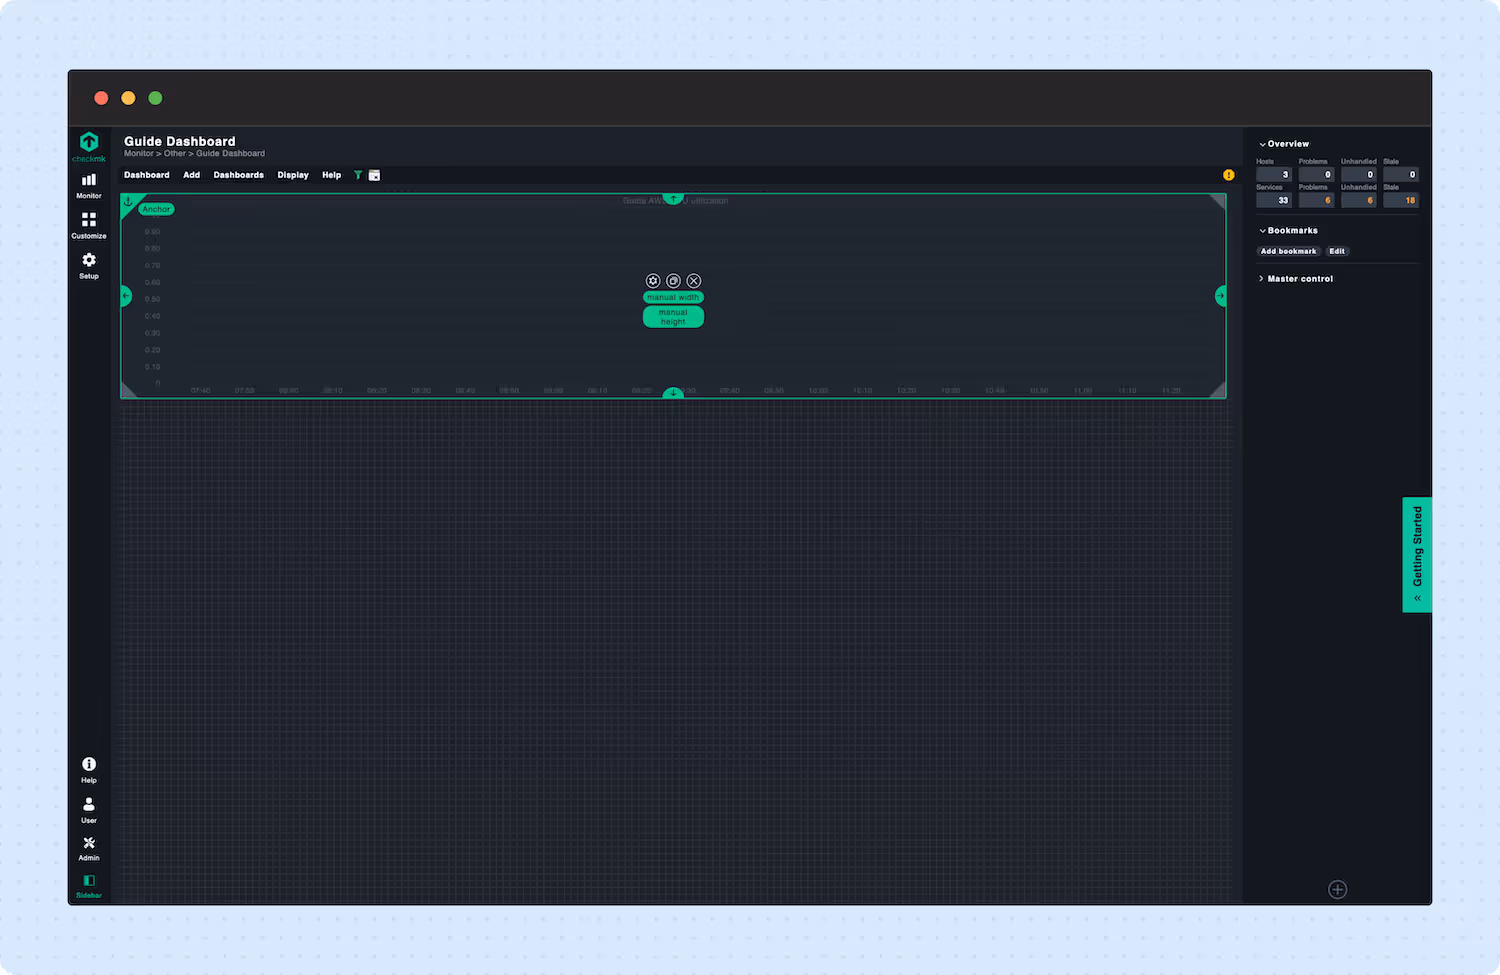
- The Checkmk dashboard feature allows you to customize the size and layout of your dashboard fully.
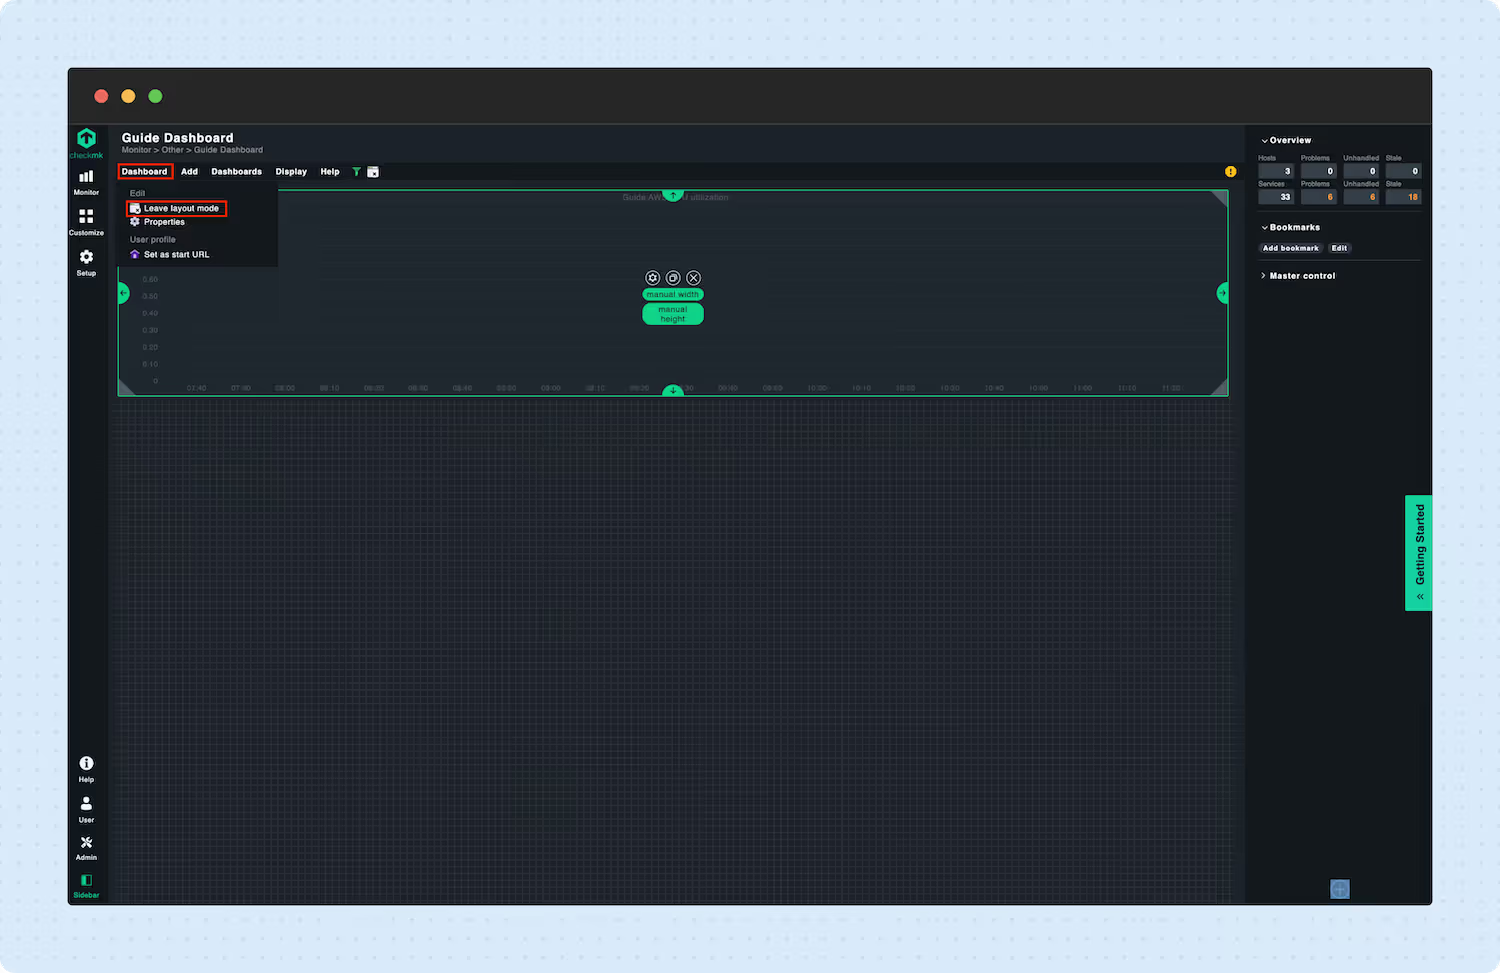
- To finalize the setup, navigate to Dashboard -> Leave layout mode.
Stage 5: Connect Checkmk Cloud with ilert
To connect Checkmk Cloud with ilert, add a new Notification rule of type ‘ilert’ and enter the Integration key of your Checkmk alert source in ilert.
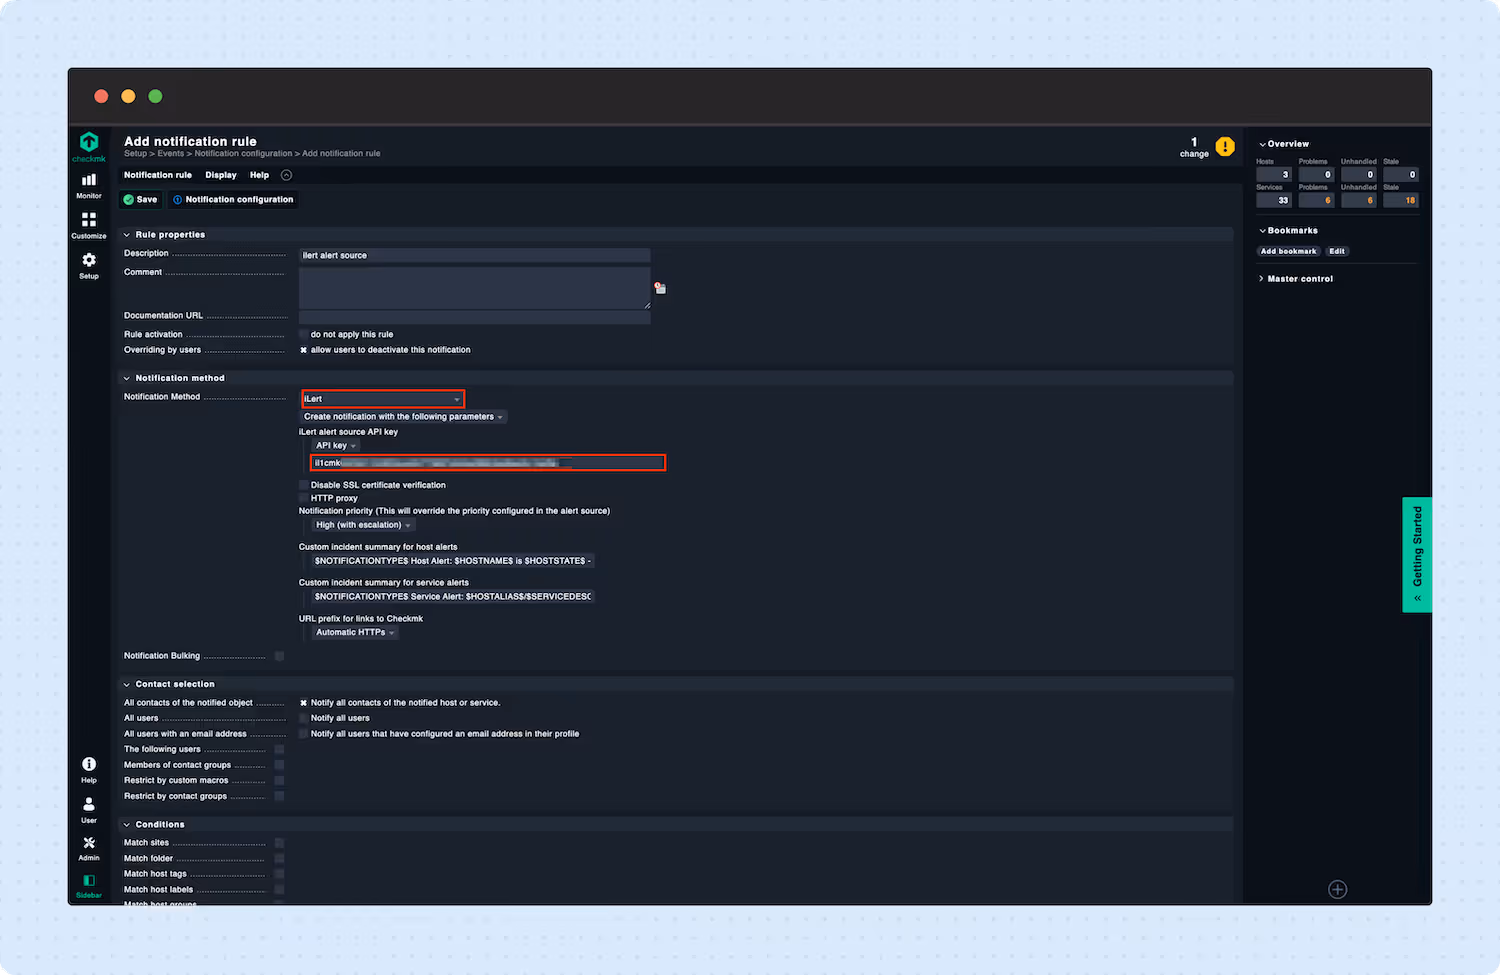
For further information, please refer to ilert's Checkmk Integration Guide.
.avif)